Desktop applications always had a special place in my heart. Ever since browsers and mobile devices got powerful, there’s been a steady decline of desktop applications which are getting replaced by mobile and web applications. Still, there’s are a lot of upsides to writing desktop applications — they are always present once they’re in your start menu or dock, they’re alt(cmd)-tabbable (I hope that’s a word) and mostly connect better with the underlying operating system (with its shortcuts, notifications, etc) than web applications.
In this article, I’ll try to guide you through the process of building a simple desktop application and touch on important concepts for building desktop application with JavaScript.
The main idea behind developing desktop applications with JavaScript is that you build one codebase and package it for each operating system separately. This abstracts away the knowledge needed to build native desktop applications and makes maintenance easier. Nowadays, developing a desktop application with JavaScript relies on either Electron or NW.js. Although both tools offer more or less the same features, I went with Electron because it has some advantages I found important. At the end of the day, you can’t go wrong with either.
Basic assumptions
I assume that you’ve got your basic text editor (or IDE) and Node.js/npm installed. I’ll also assume you’ve got HTML/CSS/JavaScript knowledge (Node.js knowledge with CommonJS modules would be great, but isn’t crucial) so we can focus on learning Electron concepts without worrying about building the user interface (which, as it turns out, are just common web pages). If not, you’ll probably feel somewhat lost and I recommend visiting my previous blog post to brush up on your basics.
A 10,000 foot view of Electron
In a nutshell, Electron provides a runtime to build desktop applications with pure JavaScript. The way it works is — Electron takes a main file defined in your package.json file and executes it. This main file (usually named main.js) then creates application windows which contain rendered web pages with the added power of interacting with the native GUI (graphical user interface) of your operating system.

In detail, once you start up an application using Electron, a main process is created. This main process is responsible for interacting with the native GUI of your operating system and creates the GUI of your application (your application windows).
Purely starting the main process doesn’t give the users of your application any application windows. Those are created by the main process in the main file by using something called a BrowserWindow module. Each browser window then runs its own renderer process. This renderer process takes a web page (an HTML file which references the usual CSS files, JavaScript files, images, etc.) and renders it in the window.
For example, if you only had a calculator application, your main process would instantiate a window with a web page where your actual web page (calculator) is.
Although it is said that only the main process interacts with the native GUI of your operating system, there are techniques to offload some of that work to renderer processes (we’ll look into building a feature leveraging such a technique).
The main process can access the native GUI through a series of modules available directly in Electron. Your desktop application can access all Node modules like the excellent node-notifierto show system notifications, request to make HTTP calls, etc.
Hello, world!
Let’s get started with a traditional greeting and install all the necessary prerequisites.
Accompanying repository
This guide is accompanied by the sound-machine-tutorial repository.Use the repository to follow along or continue at certain points. Clone the repository to get started:
github:1aa09b23382cfe418585
and then you can jump to a git tag in the sound-machine-tutorial folder with:
github:b8a9afecf191418084fd
I’ll let you know when a tag is available with a code block:
github:ec79be207a6eb9583440
Once you clone/checkout your desired tag, run:
github:634a718cd2d6c81f9df8
so that you aren’t missing any Node modules.
If you can’t switch to another tag, it would be easiest to just reset your repository state and then do the checkout:
github:a30e40d1e8cfc6ebb096
Set up shop
Follow along with the tag 00-blank-repository: git checkout 00-blank-repository
github:48ce14be1444a223baf3
In the project folder create a new package.json file in it with the following contents:
github:20dba556625798f68323
This barebones package.json:
- sets up the name and version of the application,
- lets Electron know which script the main process is going to run (main.js) and
- sets up a useful shortcut — an npm script to run the application easily by running “npm start” in your CLI (terminal or command prompt).
It’s time to get Electron. The easiest way of accomplishing that is by installing a prebuilt binary for your operating system through npm and save it as a development dependency in yourpackage.json (that happens automatically with –save-dev). Run the following in your CLI (in the project folder):
github:0c11dbecad85cb977889
The prebuilt binary is tailored to the operating system it’s being installed on and allows the running of “npm start”. We’re installing it as a development dependency because we will only need it during development.
That’s, more or less, everything you need to start developing with Electron.
Greeting the world
Create an app folder and an index.html file in that folder with the following contents:
github:4927435c7224b91e538c
In the root of the project create a main.js file. That’s the file that Electron’s main process is going to spin up and allow the creation of our “Hello, world!” web page. Create the file with the following contents:
github:a8f464e433a93d234ae4
Nothing scary, right?The app module controls your application life (for example — watching when your application is ready for creating windows).The BrowserWindow module allows window creation.The mainWindow object is going to be your main application window and is declared as nullbecause the window would otherwise be closed once JavaScripts garbage collection kicks in.
Once app gets the ready event, we create a new 800 pixels wide and 600 pixels high window using BrowserWindow.That window’s renderer process is going to render our index.html file.
Run our “Hello, World!” application by running the following in your CLI:
github:d5292f083488262cb70a
and bask in the glory that is your app.
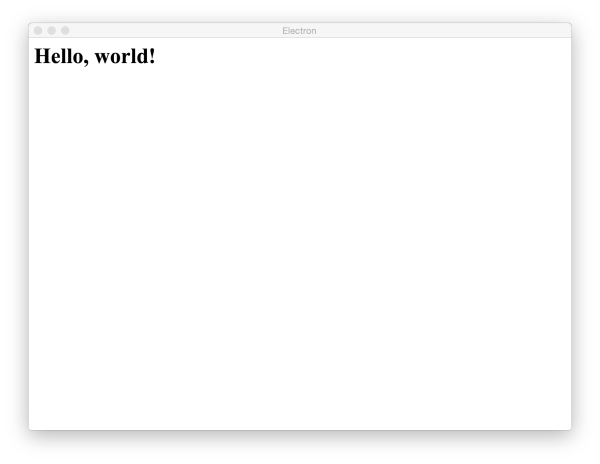
Hello indeed.
Developing a real application
A glorious sound machine
First things first — what’s a sound machine?A sound machine is a little device that makes sounds when you press various buttons, mostly cartoon or reaction sounds. It’s a funny little tool to lighten up the mood in an office and a great use case to develop a desktop application as we’re going to explore quite a few concepts while developing it (and get a nifty sound machine to boot).

The features we’re going to build and concepts we’re going to explore are:
- basic sound machine (basic browser window instantiation),
- closing the sound machine (remote messages between main and renderer process),
- playing sounds without having the application in focus (global keyboard shortcuts),
- creating a settings screen for shortcut modifier keys (Shift, Ctrl and Alt) (storing user settings in home folder),
- adding a tray icon (remotely creating native GUI elements and getting to know menus and tray icon) and
- packaging your application (packaging your application for Mac, Windows and Linux).
Building the basic feature of a sound machine
Starting point and application organization
With a working “Hello, world!” application under your belt, it’s high time to start building a sound machine.
A typical sound machine features several rows of buttons which respond to presses by making sounds. The sounds are mostly cartoonish and/or reaction based (laughter, clapping, glass breaking, etc.).
That’s also the very first feature we’ll build — a basic sound machine that responds to clicks.
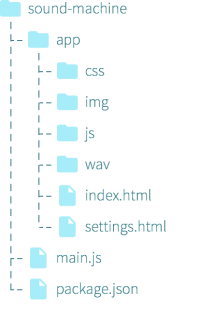
Our application structure is going to be very straightforward.
In the root of the application we’ll keep the package.json file, the main.js file and any other application-wide files we need.
The app folder will house our HTML files of various types within folders like css, js, wav and img.
To make things easier, all the files needed for web page design have already been included in the initial state of the repository. Please check the tag 01-start-project out. If you followed along and created the “Hello, world!” application, you’ll have to reset your repository and then do the checkout:
github:92b77764a77b6507733f
github:8410a4e6d71482c31cc4
To keep things simple, we’re going to have only two sounds but extending it to the full 16 sounds is simply a matter of finding extra sounds, extra icons and modifying index.html.
Defining the rest of the main process
Let’s revisit main.js to define the look of the sound machine. Replace the contents of the file with:
github:0f28be046a6bfb440ffe
We’re customizing the window we’re creating by giving it a dimension, making it non-resizable and frameless. It’s going to look like a real sound machine hovering on your desktop.
The question now is — how to move a frameless window (with no title bar) and close it?I’ll talk about custom window (and application) closing very soon (and introduce a way of communicating between the main process and a renderer process), but the dragging part is easy. If you look at the index.css file (in app/css), you’ll see the following:
github:6d488eb515b993b85066
-webkit-app-region: drag; allows the whole html to be a draggable object. There is a problem now, though — you can’t click buttons on a draggable object. The other piece of the puzzle is -webkit-app-region: no-drag; which allows you to define undraggable (and thus clickable elements). Consider the following excerpt from index.css:
github:3c2c95a4810f8fa4b052
Displaying the sound machine in its own window
The main.js file can now make a new window and display the sound machine. And really, if you start your application with npm start, you’ll see the sound machine come alive. Of course, there’s nothing happening right now because we just have a static web page.
Put the following in the index.js file (located in app/js) to get the interactivity going:
github:23644b274cd4cb77e334
This code is pretty simple. We:
- query for the sound buttons
- iterate through the buttons
- reading out the data-sound attribute
- add a background image to each button
- and add a click event to each button that plays audio (using the HTMLAudioElement interface)
Test out your application by running the following in your CLI:
github:badd9e732c8ff4be6257
 A working sound machine!
Closing the application from a browser window via remote events
github:54b0be646abd95530d2f
To reiterate — application windows (more exactly their renderer process) shouldn’t be interacting with the GUI (and that’s what closing a window is). The official Electron quick start guide says:
In web pages, it is not allowed to call native GUI related APIs because managing native GUI resources in web pages is very dangerous and it is easy to leak resources. If you want to perform GUI operations in a web page, the renderer process of the web page must communicate with the main process to request the main process perform those operations.
Electron provides the ipc (inter-process communication) module for that type of communication. ipc allows subscribing to messages on a channel and sending messages to subscribers of a channel. A channel is used to differentiate between receivers of messages and is represented by a string (for example “channel-1”, “channel-2”…). The message can also contain data. Upon receiving a message, the subscriber can react by doing some work and can even answer. The biggest benefit of messaging is separation of concerns — the main processdoesn’t have to know which renderer processes there are or which one sent a message.

That’s exactly what we’ll do here — subscribe the main process (main.js) to the “close-main-window” channel and send a message on that channel from the renderer process (index.js) when someone clicks the close button.
Add the following to main.js to subscribe to a channel:
github:1ecdae79b01ecda720d8
After requiring the module, subscribing to messages on a channel is very easy and involves using the on() method with the channel name and a callback function.
To send a message on that channel, add the following to index.js:
github:870aeafe523108ea8b6e
Again, we require the ipc module and bind a click event to the element with the close button. On clicking the close button we send a message via the “close-main-window” channel with thesend() method.
There’s one more detail that could bite you and we’ve talked about it already — the clickability of draggable areas. index.css has to define the close button as non-draggable.
github:1f608f9e0b9160608a16
That’s all, our application can now be closed via the close button. Communicating via ipc can get complicated by examining the event or passing arguments and we’ll see an example of passing arguments later.
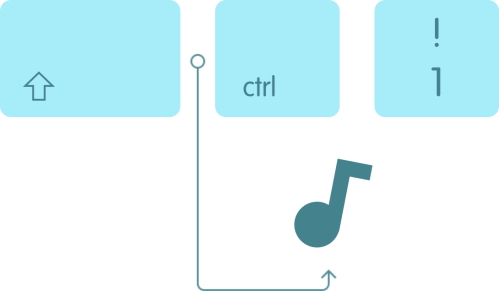
Playing sounds via global keyboard shortcuts
github:bf821f82b44d552476a4
Our basic sound machine is working great. But we do have a usability issue — what use is a sound machine that has to sit in front of all your windows the whole time and be clicked repeatedly?
This is where global keyboard shortcuts come in. Electron provides a global shortcut module which allows you to listen to custom keyboard combinations and react. The keyboard combinations are known as Accelerators and are string representations of a combination of keypresses (for example “Ctrl+Shift+1”).
Since we want to catch a native GUI event (global keyboard shortcut) and do an application window event (play a sound), we’ll use our trusted ipc module to send a message from the main process to the renderer process.
Before diving into the code, there are two things to consider:
- global shortcuts have to be registered after the app “ready” event (the code should be in that block) and
- when sending messages via ipc from the main process to a renderer process you have to use the reference to that window (something like “createdWindow.webContents.send(‘channel’)”)
With that in mind, let’s alter our main.js and add the following code:
github:376d0be66a4cd19deeed
First, we require the global-shortcut module. Then, once our application is ready, we register two shortcuts — one that will respond to pressing Ctrl, Shift and 1 together and the other that will respond to pressing Ctrl, Shift and 2 together. Each of those will send a message on the “global-shortcut” channel with an argument. We’ll use that argument to play the correct sound. Add the following to index.js:
github:dd68c719c4b71ddc7c1b
To keep things simple, we’re going to simulate a button click and use the soundButtons selector that we’ve created while binding buttons to playing sounds. Once a message comes with an argument of 1, we’ll take the soundButtons[1] element and trigger a mouse click on it (note: in a production application, you’d want to encapsulate the sound playing code and execute that).
Configuring modifier keys via user settings in a new window
github:bad58bb0b3ed34bc84af
With so many applications running at the same time, it could very well be that the shortcuts we’ve envisioned are already taken. That’s why we’re going to introduce a settings screen and store which modifiers (Ctrl, Alt and/or Shift) we’re going to use.
To accomplish all of that, we’ll need the following:
- a settings button in our main window
- a settings window (with accompanying HTML, CSS and JavaScript files)
- ipc messages to open and close the settings window and update our global shortcuts and
- storing/reading of a settings JSON file from the user system.
Phew, that’s quite a list.
Settings button and settings window
Similar to closing the main window, we’re going to send messages on a channel from index.jswhen the settings button gets clicked. Add the following to index.js:
github:1fd0313f407b769f6397
After clicking the settings button, a message on the channel “open-settings-window” gets sent.main.js can now react to that event and open up the new window. Add the following to main.js:
github:2ce1eaf342e6a7436d37
Nothing new to see here, we’re opening up a new window just like we did with the main window. The only difference is that we’re checking if the settings window is already open so that we don’t open up two instances.
Once that works, we need a way of closing that settings window. Again, we’ll send a message on a channel, but this time from settings.js (as that is where the settings close button is located). Create (or replace the contents of) settings.js with the following:
github:2ecc3fa1f7d337174a8e
And listen on that channel in main.js. Add the following:
github:e95075b4a3bbcecd063c
Our settings window is now ready to implement its own logic.
Storing and reading user settings
github:8419ed17560292d21abf
The process of interacting with the setting windows, storing the settings and promoting them to our application will look like this:
- create a way of storing and reading user settings in a JSON file
- use these settings to display the initial state of the settings window
- update the settings upon user interaction and
- let the main process know of the changes.
We could just implement the storing and reading of settings in our main.js file but it sounds like a great use case for writing a little module that we can then include in various places.
Working with a JSON configuration
That’s why we’re going to create configuration.js file and require it whenever we need it. Node.js uses the CommonJS module pattern which means that you export only your API and other files require/use the functions available on that API.

To make storing and reading easier, we’ll use the nconf module which abstracts the reading and writing of a JSON file for us. It’s a great fit. But first, we have to include it in the project with the following command executed in the CLI:
github:873917bef549894b0bd4
This tells npm to install the nconf module as an application dependency and it will be included and used when we package our application for an end user (in contrast to installing with thesave-dev argument which will only include modules for development purposes).
The configuration.js file is pretty simple, so let’s examine it fully. Create a configuration.js file in the root of the project with the following contents:
github:f2a61b9e0e2fe7fdc0ea
nconf only wants to know where to store your settings and we’re giving it the location of the user home folder and a file name. Getting the user home folder is simply a matter of asking Node.js (process.env) and differentiating between various platforms (as observed in thegetUserHome() function).
Storing or reading settings is then accomplished with the built-in methods of nconf (set() for storing, get() for reading with save() and load() for file operations) and exporting the API by using the standard CommonJS module.exports syntax.
Initializing default shortcut key modifiers
Before moving on with settings interaction, let’s initialize the settings in case we’re starting the application for the first time. We’ll store the modifier keys as an array with the key “shortcutKeys” and initialise it in main.js. For all of that to work, we must first require our configuration module:
github:24bf33c10b2187c3b417
We try reading if there’s anything stored under the setting key “shortcutKeys”. If not, we set an initial value.
As an additional thing in main.js, we’ll rewrite the registering of global shortcut keys as a function that we can call later when we update our settings. Remove the registering of shortcut keys from main.js and alter the file this way:
github:4dbf901ff0e3109be543
The function resets the global shortcuts so that we can set new ones, reads the modifier keys array from settings, transforms it to a Accelerator-compatible string and does the usual global shortcut key registration.
Interaction in the settings window
Back in the settings.js file, we need to bind click events which are going to change our global shortcuts. First, we’ll iterate through the checkboxes and mark the active ones (reading the values from the configuration module):
github:0b84c984fbc739af887c
And now we’ll bind the checkbox behavior. Take into consideration that the settings window (and its renderer process) are not allowed to change GUI binding. That means that we’ll need to send an ipc message from settings.js (and handle that message later):
github:1676623c06ffeafd6bb8
It’s a bigger piece of code but still pretty simple.We iterate through all the checkboxes, bind a click event and on each click check if the settings array contains the modifier key or not — and according to that result, modify the array, save the result to settings and send a message to the main process which should update our global shortcuts.
All that’s left to do is subscribe to the ipc channel “set-global-shortcuts” in main.js and update our global shortcuts:
github:722d68b269f3c092a347
Easy. And with that, our global shortcut keys are configurable!
What’s on the menu?
github:fbabae6c5ada0618a487
Another important concept in desktop applications are menus. There’s the always useful context menu (AKA right-click menu), tray menu (bound to a tray icon), application menu (on OS X), etc.

In this guide we’ll add a tray icon with a menu. We’ll also use this opportunity to explore an other way of inter-process communication — the remote module.
The remote module makes RPC calls from the renderer process to the main process. In practice, it means that you remotely request native GUI modules from main.js and call methods on them. In that way, you could require the BrowserWindow object from the main process and instantiate a new browser window in a window (renderer process). Behind the scenes, that’s still a synchronous ipc message but it provides a very good tool to promote organization in your code.

Let’s see how we’d create a menu and bind it to a tray icon while doing it in a renderer process. Add the following to index.js:
github:a04d753854baf10d07fd
The native GUI modules (menu and tray) were required remotely and that way it’s safe to use them here.
A tray icon is defined through its icon. OS X supports image templates (by convention, an image is considered a template image if its filename ends with “Template”) which makes it easy to work with the dark and light themes. Other OSes get a regular icon.
There are multiple ways of building a menu in Electron. This way creates a menu template (a simple array with menu items) and builds a menu from that template. At the end, the new menu is attached to the tray icon.
Packaging your application
github:ff5f9d7eb916b102b3e9
What’s the use of an application which you can’t let people download and use?

Packaging your application for all platforms is easy using electron-packager. In a nutshell, electron-packager abstracts away all work going into wrapping your app with Electron and generates all platforms for which you’re going to publish.
It can be used as a CLI application or as part of a build process. Building a more complicated build scenario is not in the scope of this article, but we’ll leverage the power ofnpm scripts to make packaging easier. Using electron-packager is trivial, the general form when packaging an application is:
github:9a36b2b9a43730e09e08
where:
- location of project points to the folder where your project is,
- name of project defines the name of your project,
- platform decides for which platforms to build (all to build for Windows, Mac and Linux),
- architecture decides for which architectures to build (x86 or x64, all for both) and
- electron version lets you choose which Electron version to use.
The first package is going to take a while because all the binaries for all platforms have to be downloaded. Subsequent packages are much faster.
I package the sound machine typically like this (on a Mac):
github:51e9f25aff955482638d
The new options included in the command are self-explanatory. To get a nice icon, you’ll first have to convert it to .icns (for Mac) and/or .ico (for Windows). Just search for a tool to convert your PNG file to these formats like this one (be sure to download the file with the .icnsextension and not .hqx). If packaging for Windows from a non-Windows OS, you’ll need wine on your path (Mac users can use brew, while Linux users can use apt-get).
It doesn’t make sense to run that big command every time. We can add another script to ourpackage.json. First of all, install electron-packager as a development dependency:
github:5dcae4319365cf611879
Now we can add a new script to our package.json file:
github:3cf4f837ccba72af78e3
And then run the following in CLI:
github:8d525991a20daca97910
The package command starts the electron-packager, looks in the current directory and build to Desktop. The script should be changed if you are using Windows, but that is trivial.
The sound machine in its current state ends up weighing a whopping 100 MB. Don’t worry, once you archive it (zip or an archive type of your choice), it’ll lose more than half its size.
If you really want to go to town, take a look at electron-builder which takes the packages produced by electron-packager and creates automated installers.
Additional features to add
With the application packaged and ready to go, you can now start developing your own features.
Here are some ideas:
- a help screen with info about the app, its shortcuts and author,
- adding an icon and a menu entry to open the info screen,
- build a nice packaging script for faster builds and distribution,
- add notifications using node-notifier to let users know which sound they’re playing,
- use lodash to a greater extent for a cleaner code base (like iterating through arrays),
- minify all your CSS and JavaScript with a build tool before packaging,
- combine the aforementioned node-notifier with a server call to check for new versions of your app and notify users…
For a nice challenge — try extracting your Sound machine browser windows logic and using something like browserify to create a web page with the same sound machine you’ve just created. One code base — two products (desktop application and web application). Nifty!
Diving deeper into Electron
We’ve only scratched the surface of what Electron brings to the table. It’s pretty easy to do things like watching for power events on the host machine or getting various information on the screen (like cursor position).
For all of those built-in utilities (and generally while developing applications with Electron),check out the Electron API docs.
These Electron API docs are a part of the docs folder at the Electron GitHub repository and that folder is well worth checking out.
Sindre Sorhus maintans an awesome list of Electron resources on which you can find really cool projects and information like an excellent overview of a typical Electron application architecture which can serve as a refresher on the code we’ve been developing up until now.
In the end, Electron is based on io.js (which is going to be merged back into Node.js) and most of Node.js modules are compatible and can be used to extend your application. Just browsenpmjs.com and grab what you need.
Is that all?
Not by a long shot.
Now, it’s time to build a bigger application. I’ve mostly skipped on using extra libraries or build tools in this guide to concentrate on important issues but you can easily write your app in ES6 or Typescript, use Angular or React and simplify your build with gulp or Grunt.
With your favorite language, framework and build tool, why not build a Flickr sync desktop application using the Flickr API and node-flickrapi or a GMail client using Google’s official Node.js client library?
Pick an idea that’s going to motivate you, init a repository and just do it.