Last time I gave you an introduction to my ideas about benchmarking. I explained to you that comparing performance between different compilers and implementations is as old as programming ifself, and, above all, it is not that simple to setup as it sounds. If you don’t know what I write about, have a look at the former post on this topic. There, I explained, how to setup a simple Gradle task which runs JMH benchmarks as part of a Gradle task chain. However, the first article is no prerequisite at all for this article!
Today I want to start from the other side. As a C++ developer who wants to participate in a performance challenge, I want
- a framework that outputs numbers that can be compared with other benchmark results
- to run all benchmarks at once
- to compare my results with other implementations or compiler assemblies
- to execute all in one task chain
1.) Before you continue
We need to make sure that you have a compiler chain up and running on your machine if you want to try out the examples. If not, don’t care about this section.
If you are a MacOS user: You can start with the XCode Clang compilers, which you probably have already installed. Otherwise get it from the AppStore. After installing, the MacOS C++ compiler should report for duty with
$> c++ -v
Advanced MacOS: Alternatively you can install a GNU compiler collection (gcc), for example with homebrew. I suggest to use the most recent one, which is gcc-4.9. After installation, you probably want to adapt the aliases homebrew created for you in usr/local/bin. Because XCode also provides gcc compliant executables, you will be wondering that gcc seems to be in place, but gcc -v tells you that it refers to the Clang compiler. Homebrew created aliases suffixed with the version number you installed. Now it is up to you how you want to bring the real gcc executables in place, either by creating new aliases or renaming the existing ones. Important is the result,
$> g++ -v
should report something like gcc version 4.9.2 (Homebrew gcc49 4.9.2). That’s basically the same way, Gradle will detect out tool chain later on.
On Linux, you probably already have everything in place. But to be sure, also try the version checks for either the Clang or the gcc tool chain. If nothing reports for duty, please install the tool chain of your choice including C++ compiler with the package manager of your distribution.
For Windows systems MinGW or Cygwin should help you out with appropriate environments which offer the executables you need. But to be honest, I have never tried it yet ;) If you have a native POSIX compliant, package manager-backed environment available, do yourself a favor, please use that one.
2.) Gradle Native Binaries
In blog post part 1 the build tool of choice was Gradle, on purpose of course as we see later on. Since version 2.0, Gradle ships with – yet incubating but powerful – tasks for native binary builds. With the recently released version 2.3 the features were refactored and generalized. The simplicity to set such native binary build up is comparable to default java builds. Give it a try! Your new cpp build.gradle should look like:
Note: All my examples are based on the recent DSL changes introduced by Gradle 2.3.
github:dd89642ecf60be5655ad
Now, there is much convention over configuration which helps you out. The following directory structure will be assumed by the plugin:
github:ba380e830fc0f7026b69
Your script file now reads: Gradle will try to assemble an executable called ‘hello’, based on all cpp source files contained in src/hello/cpp.
Gradle itself tries to detect compilers you have installed. That means, you do not need to configure something special, unless you have a very custom or complex environment.
The command
github:754e9754f7cf62c40831
executed in your PROJECT_DIR tells you all interesting details about your assemblies:
github:c328913a2ac972e31daf
3.) Try it!
Create those directories and create a file named world.cpp in PROJECT_DIR/src/hello/cpp with the following Hello World:
github:b84e9f2532b5c0504d4d
Then on the command line, try
github:c24a4304689f86ce7d34
and see which compiler chain Gradle will use.
After executing
github:049645c9c37622688aec
you will find an executable called hello in PROJECT_DIR/build/binaries/helloExecutable/.
All Gradle default definitions can be changed of course. For more details I refer to the Gradle documentation. There you also find details about library builds, compiler settings, and all other details we could need for the next sections.
4.) Benchmarking C++ code with Hayai
In order to get similar numbers for C++ code as we got them for Java code with JMH, we also need a micro benchmarking library. Nick Bruun introduced a simple and extendable approach and called it Hayai (japanese for ‘fast’).
The following sections require a basic understanding of how native binary applications are built in general. I also recommend to install a C/C++ IDE. Since some months, JetBrains offers an early access preview of CLion, which looks very promising and is based on CMake build project setups.
When checking out the Hayai library code from Github the first time we will find the source code along with a Cmake build file. Hmmm, that’s nice but not fitting to our setup we are aiming to. Unfortunately there grew many different build tools for native binaries. Cmake/Make/Sconstruct and flavors make up the majority. Gradle is rather new in this domain, and is not yet supported that much. But that is fine. Here is a possible setup and Gradle build file which allows you to compile Hayai, without even touching the Hayai directory! Let’s extend our previous PROJECT_DIR with a lib folder.
github:82c79734d75d7ef6a006
Directly clone the Hayai Git repository into the new lib directory. Hint: If you are using Git for your project: You could also create a Git sub-module for the Hayai repository. That saves you from checking the library source in to your repository.
Now extend your build.gradle as follows:
github:97669b7e1f833b93d0b9
Now lets have a second look at the components task output:
github:4f5ec2ddcb512c05586b
Automagically, Gradle added two new entries for our hayaiLib definition. Good to go for another assemble, which should place two new artifacts in the build/binaries directory! Consequently everything is prepared to add our first Hayai benchmark:
Add the file sampleBenchmark.cpp to your src/hello/cpp directory:
github:c82108ff55c1d76778fd
Adapt world.cpp that it looks like this:
github:4cf4340fc0eea65d7778
This is the default main() method, which Hayai suggests. From there, you can configure all parts of it.
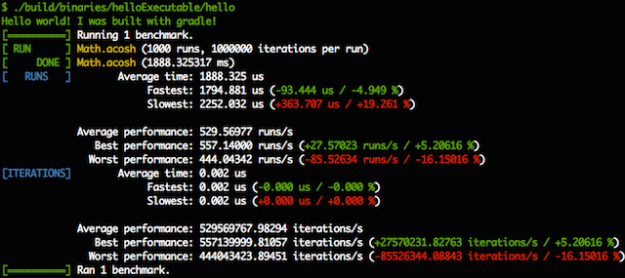
Now finally run a last assemble and launch build/binaries/helloExecutable/hello. This is what you should get:
5.) The cherry on top
We executed our first C++ benchmark, checked. Now before I close this article, I would like to show you, how to create your own Gradle task that directly executes the compiler output, so that we have a single-command compile & benchmark task. Gradle offers a default Exec task you can use in order to define a shell execution task which depends on the assembly task:
github:fcb8594ad612c6f3be1f
After adding these lines to your build.gradle, you can from now on simply run
github:37dfbbb4461e52012cca
which does an assemble if necessary and executes the resulting hello executable right after. This simple solution should just give you a hint, that it is a piece of cake to directly run the output of a previous task. That snippet offers much potential to be improved so that it is not depending on the static path definition to the executable.
All examples I gave about running hayai benchmarks with Gradle can be found in my example Github project on the branch crolabefra_starting_point.
6.) Summary and what’s next
In this article I presented two major things to you. First, it is very simple to setup a built-in Gradle task that is capable of creating a native binary and I showed to you how you can add libraries to the assembly. Now, the important thing is the higher goal we are still aiming: A Historized Automated Cross Language Benchmarking Framework, which is able to
- benchmark Java Code (JMH + Gradle task)
- benchmark C++ Code (Hayai + Gradle task)
- bring everything in a proper and more generic structure
- extract and merge benchmark results
- historize results together with revision pointers
The first two topics can be called done now. Regarding 3. I can give a short outlook: Currently, our benchmarks lie in the same project/module as our program code. This is ‘ok’ but limits flexibility. Especially the actual project build scripts now depend on testing frameworks we actually do not need to build the application itself. Goal of the next article is to show, how to efficiently structure the projects and how to bring all benchmarks together in one cross-language frame project I would like to call CroLaBeFra.
Cheers Benni
You think comSysto could assist you with rolling out new technologies just like Gradle, Git in your company? Profit from our way of doing things and meet us on one of our user groups we host, or simply contact us directly!
Further articles of this series:
