Introduction
You might have used eslint before with an eslintrc file to enforce some codestyle. But did all your team-members really care about the codestyle? Maybe only your buildserver ran eslint checks and complained a little but no one really cared? And maybe you always wondered why some developers made semi-colons and others didn’t? And maybe you are somone who will really go crazy without some rules about code-style?
If you answered some or all of the questions with yes, then your pain shall be relieved now.
In this blog-post we shall configure ESLint to enforce Airbnb codestyle for a small react application. Furthermore we will configure our IDE to show us codestyle errors right away. Finally we will use some tools to automatically configure a git pre-commit hook to enforce eslint before code can be pushed to the remote repository.
Why choose the Airbnb codestyle? Well I looked at some available styles and this one really is 98% close to what I want my code to look like. Also Airbnb codestyle enforces some rules on React out of the box, so it is up to you what you use (A discussion about codestyle is off-topic for this blog-post).
Why eslint? Well there are some other tools out there like JSCS, JSHint or JSLint, but it seems ESLint is the most common used one at the time of writing.
Requirements that should be met
We don’t want to enforce codestyles to annoy people, we want to enforce codestyle to have certain requirements met. These are in particular:
- Less careless mistakes - our IDE will tell us for example to use const instead of let or that we forgot a semi-colon.
- enforce ECMAScript 6 - Maybe you are a little old school like me and it might happen that you write function(foo) { .. } therefore your IDE will guide you to write (foo) => (…) instead.
- Improve Diffs for Code Reviews - You also might have had some guy who committed one line of code and the diff showed the whole file as changed because of reformatted intendation. Having an enforced codestyle will prevent that from happeing and improve the readability of diffs.
- clean and consistent Codebase - You should be able to open any JS file and should immediately be able to understand the code since it has consitent code style.
- enforce early - Maybe you have been in some projects where linting was enforced late in the CI buildchain on the CI server? Or you needed to run it manually? And even if there were linting errors maybe developers didn’t care? I have seen it all and that’s why in my opinion it should be enforced as early as possible. Therefore our first line of defense is the IDE. The second line of defense will be a git pre-commit hook which will prevent developers from pushing code to the remote repository that does not meet the codestyle.
Demo Project and Screencast
We will perform our actions on an existing React project called Avatar Picker which had no codestyle before. You can see the code before we applied our changes in the pre-codestyle git tag.
Note that our demo-project uses webpack as build-tool and npm as package-manager. Also Babel is used on the code to build a ES5 code-bundle. The build-chain is based on essential-react which is pretty neat.
You can watch the three steps described in this blog post applied to the demo project in this screencast.
youtube:I5jWO5b7YrE
Step 1 - Install and configure ESLint
Based on the eslint-config-airbnb documentation we configure the Airbnb rules together with eslint like this.
shell:npm install --save-dev eslint-config-airbnb eslint-plugin-import eslint-plugin-react eslint-plugin-jsx-a11y eslint
github:355130b8d566f4c5fc5417050d4e2bc3
Now we can run ESLint and we should see many linting errors.
shell:npm run eslint
Now we know how ESLint works. So let’s continue to setup our IDE to show us the errors directly during editing.
Step 2 - Configure IntelliJ IDEA and fix Codestyle errors
We want to tell our IDE that we want to indent with 2 spaces for js files and that our files should be UTF-8. Our line endings should be linux ones. Therefore we create a the .editorconfig file in the root folder of our project. JetBrains IntelliJ IDEA and WebStorm have EditorConfig built in so creatign the file is enough to enable it. Other IDEs have plugins for EditorConfig.
github:5a5d1e0cd6b323685487b58a14cb3e70
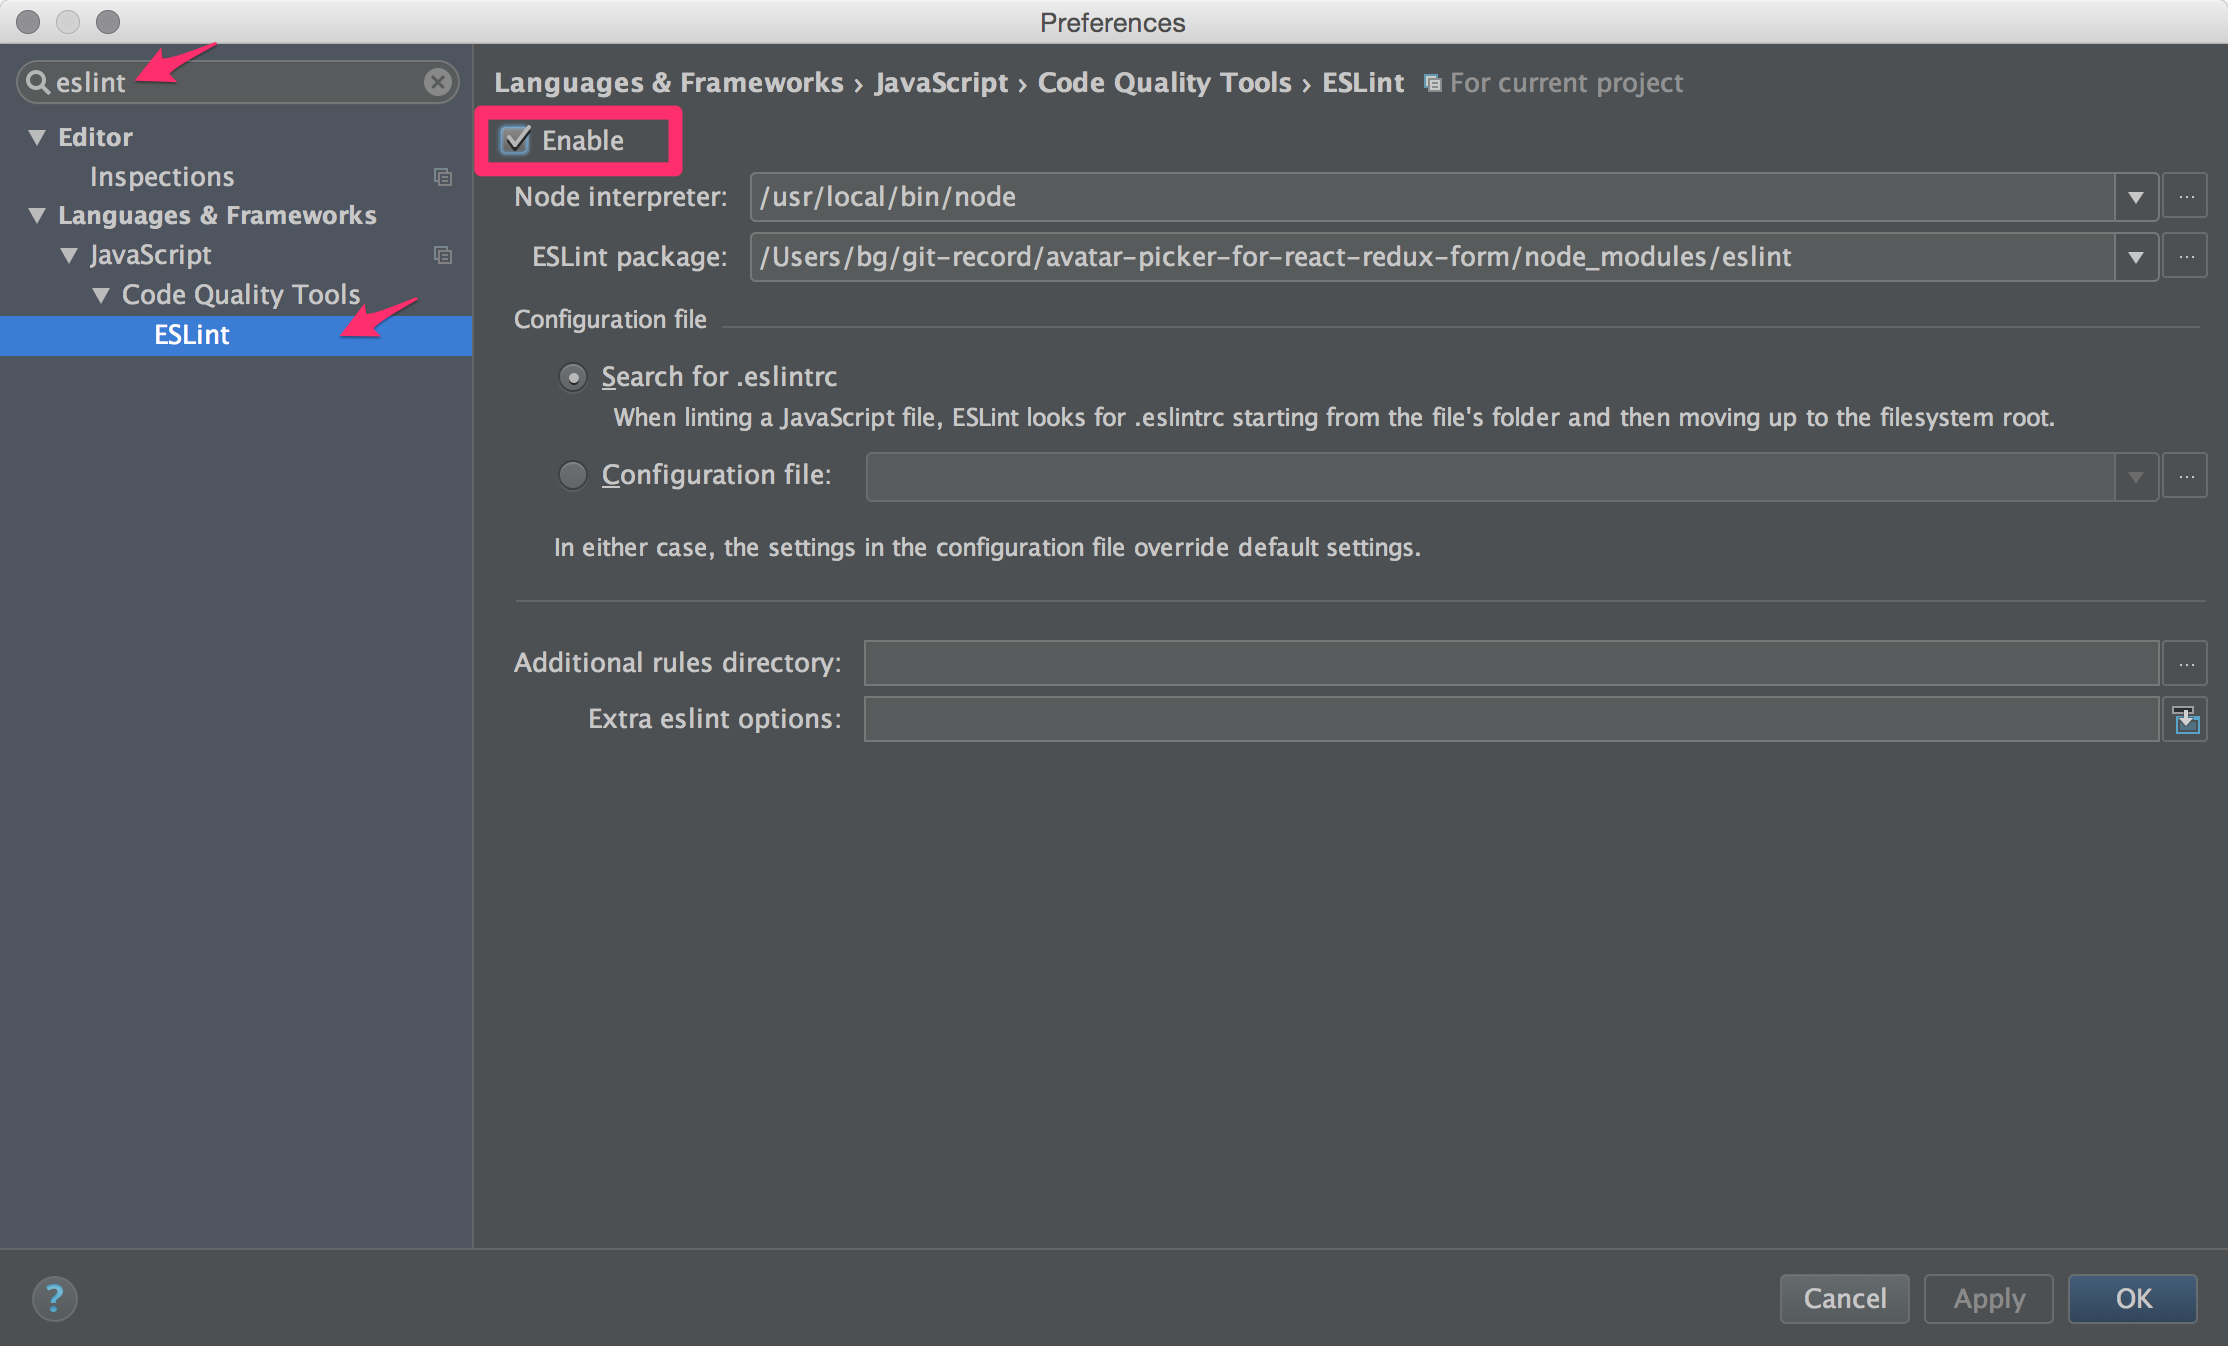
Now we need to configure IntelliJ to work with ESLint. ESLint is preinstalled in IDEA so we just need to enable it in the preferences.
Since the codestyle wants us to use commas at the last element of objects and arrays we disable the IDEA code inspection for that.

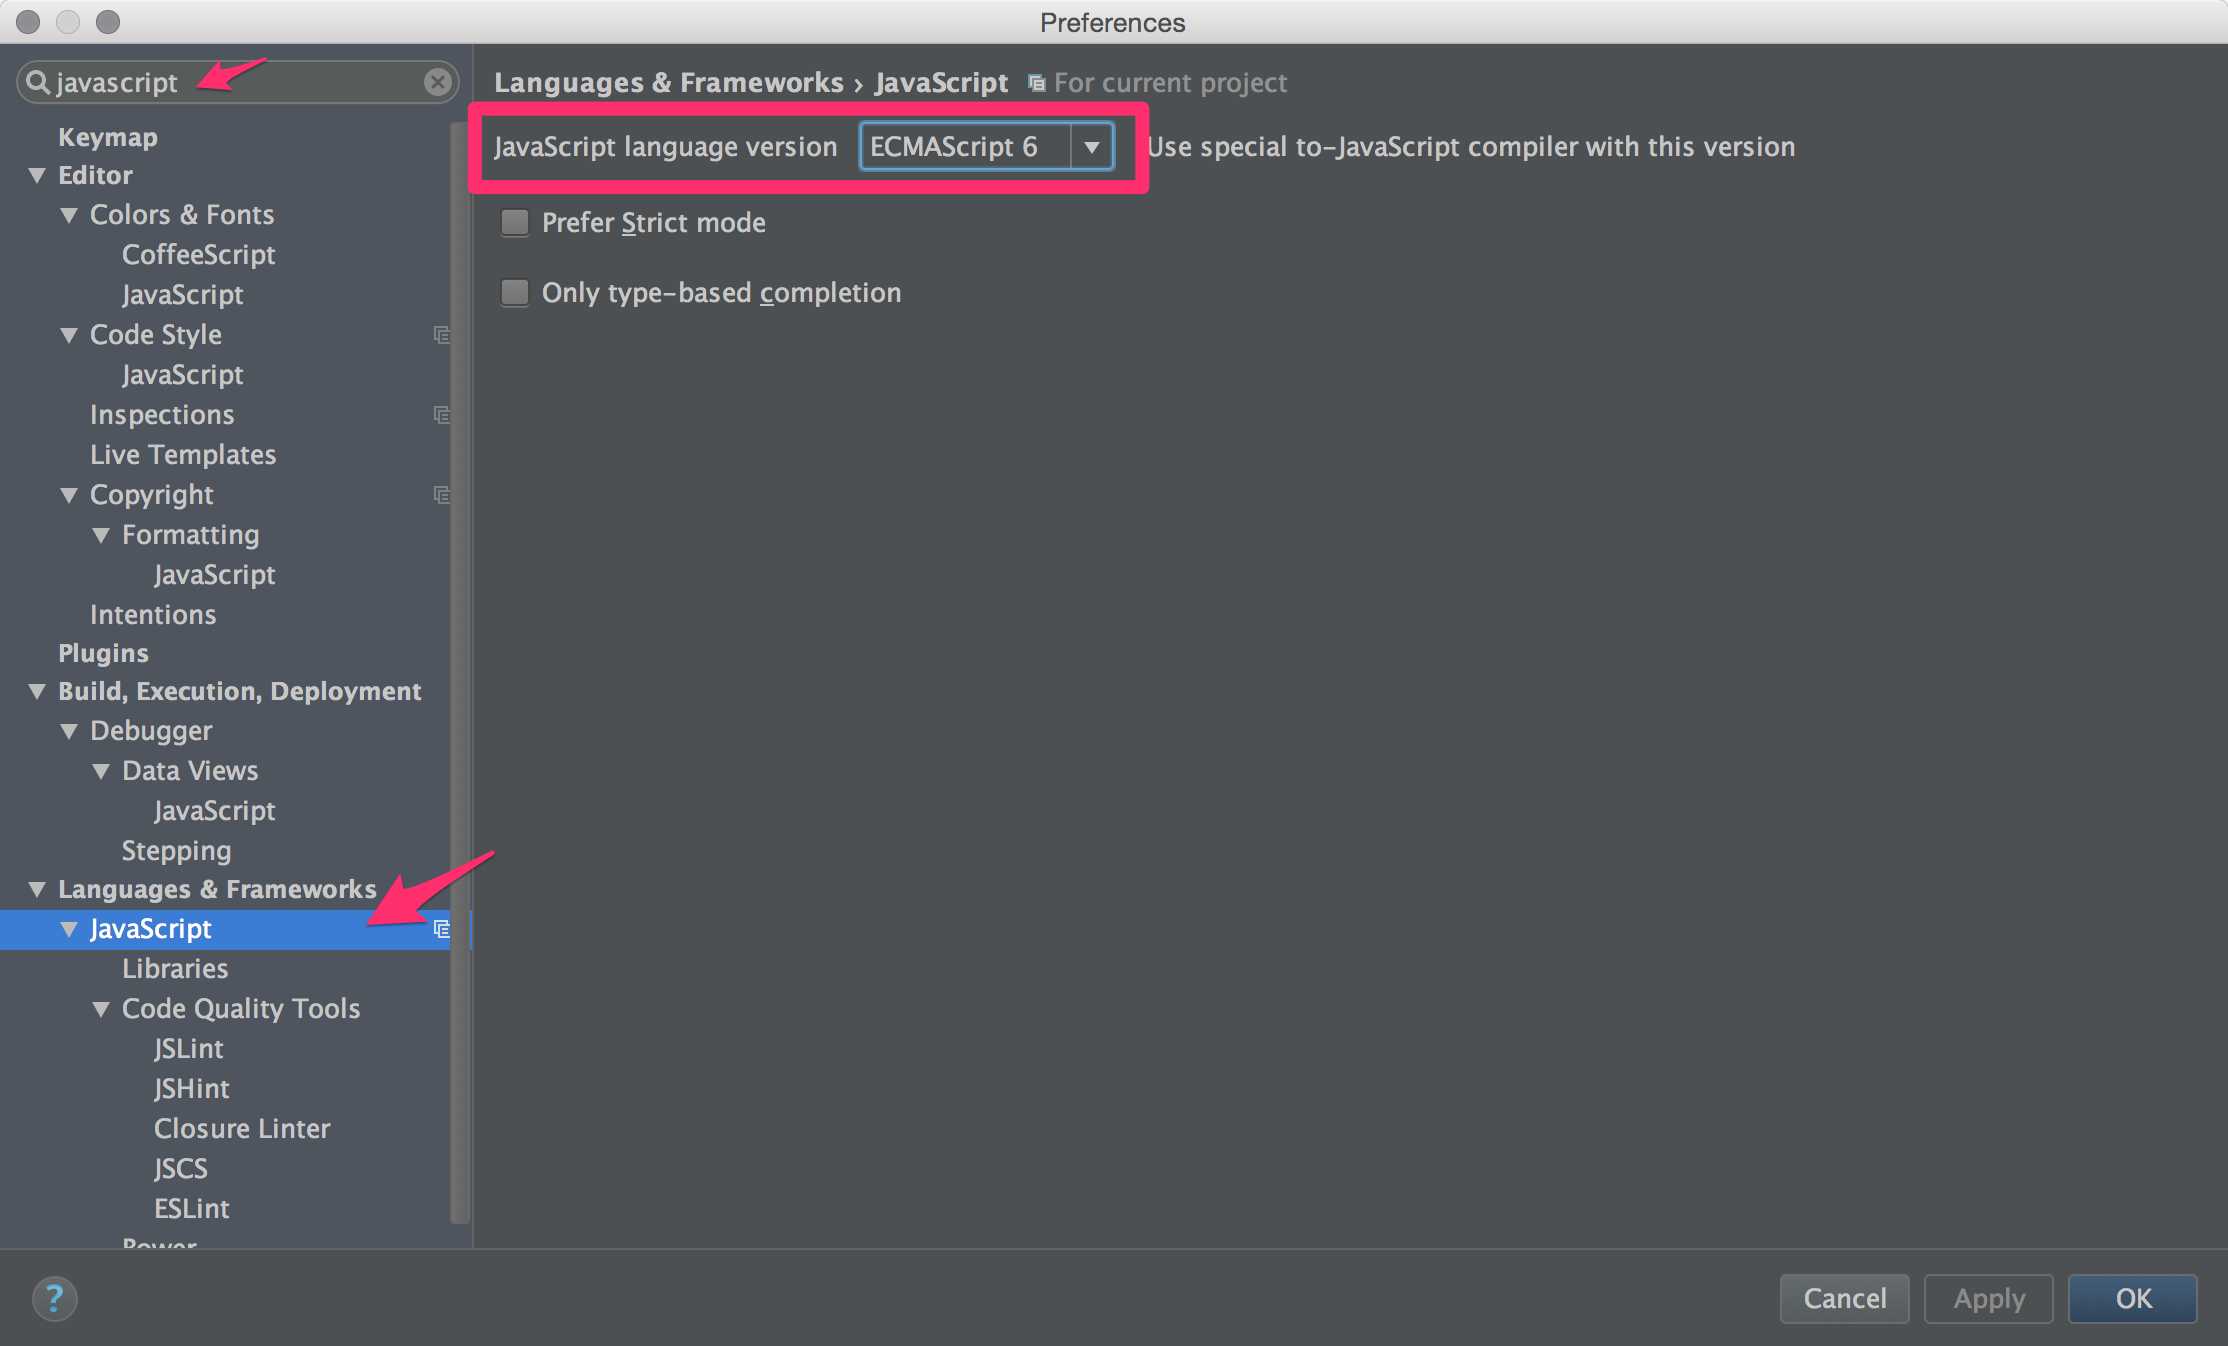
Our code level is ECMAScript 6, so let’s configure that as well.
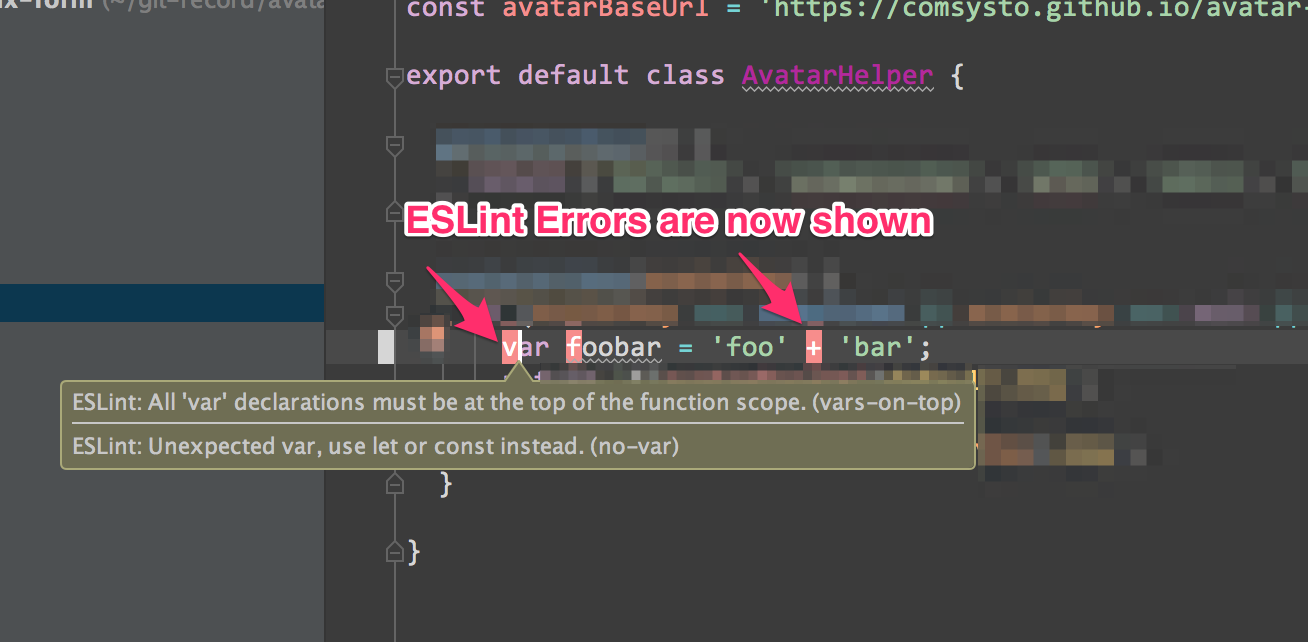
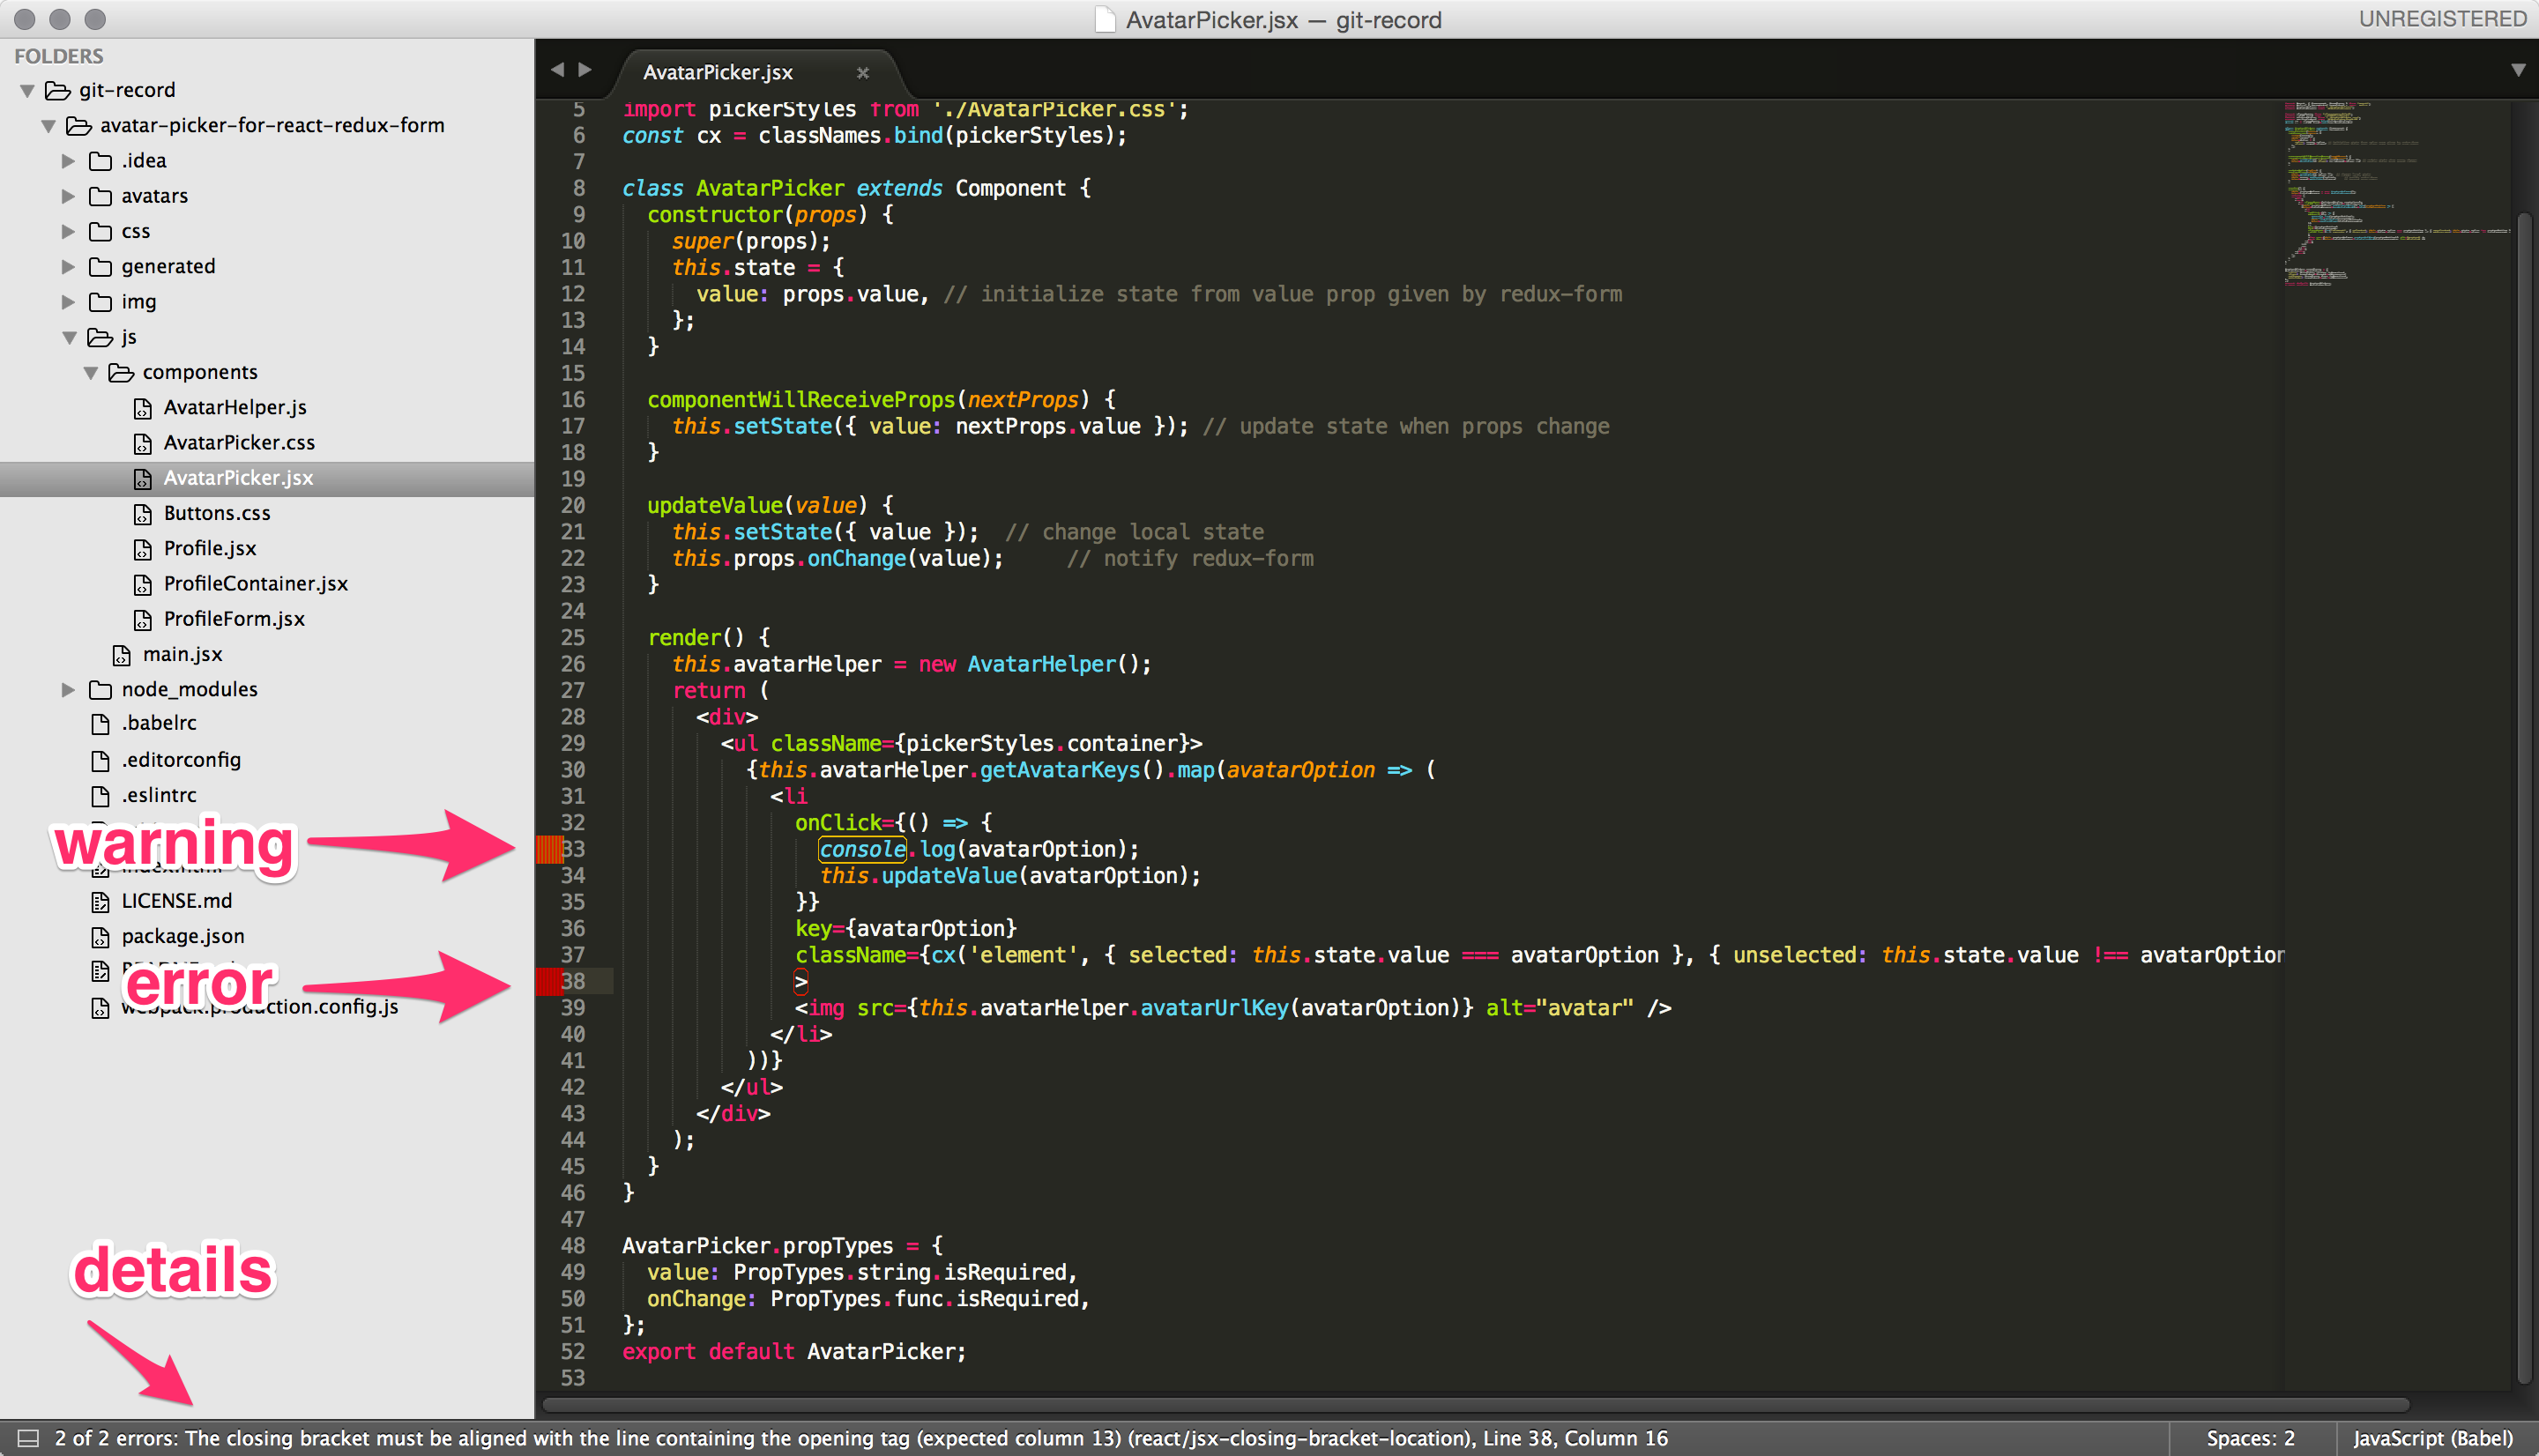
Last but not least you should see ESLint Errors now when you open a javascript file.
You can watch the Video to see how I actually fix the ESLint errors. In the next step we setup an automatic git pre-commit hook to enfore eslint before developers can push to the remote repository.
Setup for Sublime Text 3
- first install Package Control
- Open Sublime Text and press CMD+SHIFT+P and Type Install Packages
- Select Babel for react support and install
- Select SublimeLinter and install
- Select SublimeLinter-contrib-eslint and install
- you might need to restart Sublime but it should work out of the box
Step 3 - Configure automatic git pre-commit hook
You might have heard of post-commit hooks already. These are executed on the server of the remote-repository. An example usage of a post-commit hook are GitHub Webhooks which can trigger a build after something was pushed to the repository.
Pre-commit hooks are executed locally on your cloned copy of the remote repository. The problem is, that the hooks are not cloned from the remote repository. Therefore we need a mechanism to install the pre-commit hook automatically once we run npm install.
Of course someone already thought of that and there are some tools out there to do that. I chose observing/pre-commit which is a node.js pre-commit hook auto-installer. I also ran into pre-commit by Yelp which is also pretty neat but since it is python based I choose the node.js based tool. Furthermore I don’t like global installs of external tools. Only npm is installed globally on my system and I execute all node.js binaries from ./node_modules/.bin/binaryname.
Enough theoretical jibber jabber. Let’s get to it and configure our package.json to execute the eslint script as pre-commit hook.
github:c56f1f1b83241b3cfaa3d1bb5802b935
Now just install the pre-commit tool via npm. If your code does not reside in src folder change it to your needs.
shell:npm install --save-dev pre-commit
Windows users note:
- Since during install a symlink is created for the hook you need an administrator cmd-window to run the npm install.
- So if the majority of your developers use Windows you might be better of using pre-commit by Yelp
Conclusion
Now everytime you run git commit you will be notified of ESLint errors and are forced to fix them before pushing to the remote repository. Of course you should still run ESLint on your buildsystem as part of Continuous Integration, but now developers are forced apply the codestyle directly while writing their code.
About once or twice a month we will inform via newsletter on various topics that concern us. Subscribe to our newsletter (at bottom of page) - it’s the easiest way to get a steady insight into our activities.