Introduction
I was always unhappy with the way we deploy our applications and in every new project we setup the exact same stuff over and over again. The wish for simplicity was growing strong. Just that day starring at the empty mailbox an email popped up.
Congratulations! Here’s your invite to Bitbucket Pipelines Beta
I totally forgot that I signed up for it but having read about Bitbucket Pipelines beforehand I wanted to try it out immediately.
Requirements for the Build and Deploy Chain
Ok but what to deploy? So I figured out the thing I wanted to deploy was the following, since this is the basic stuff I always set up in any project:
- React Application build with npm.
- Deploy to GitHub Pages
- Build and Deploy feature branches to subdirectories on GitHub Pages.
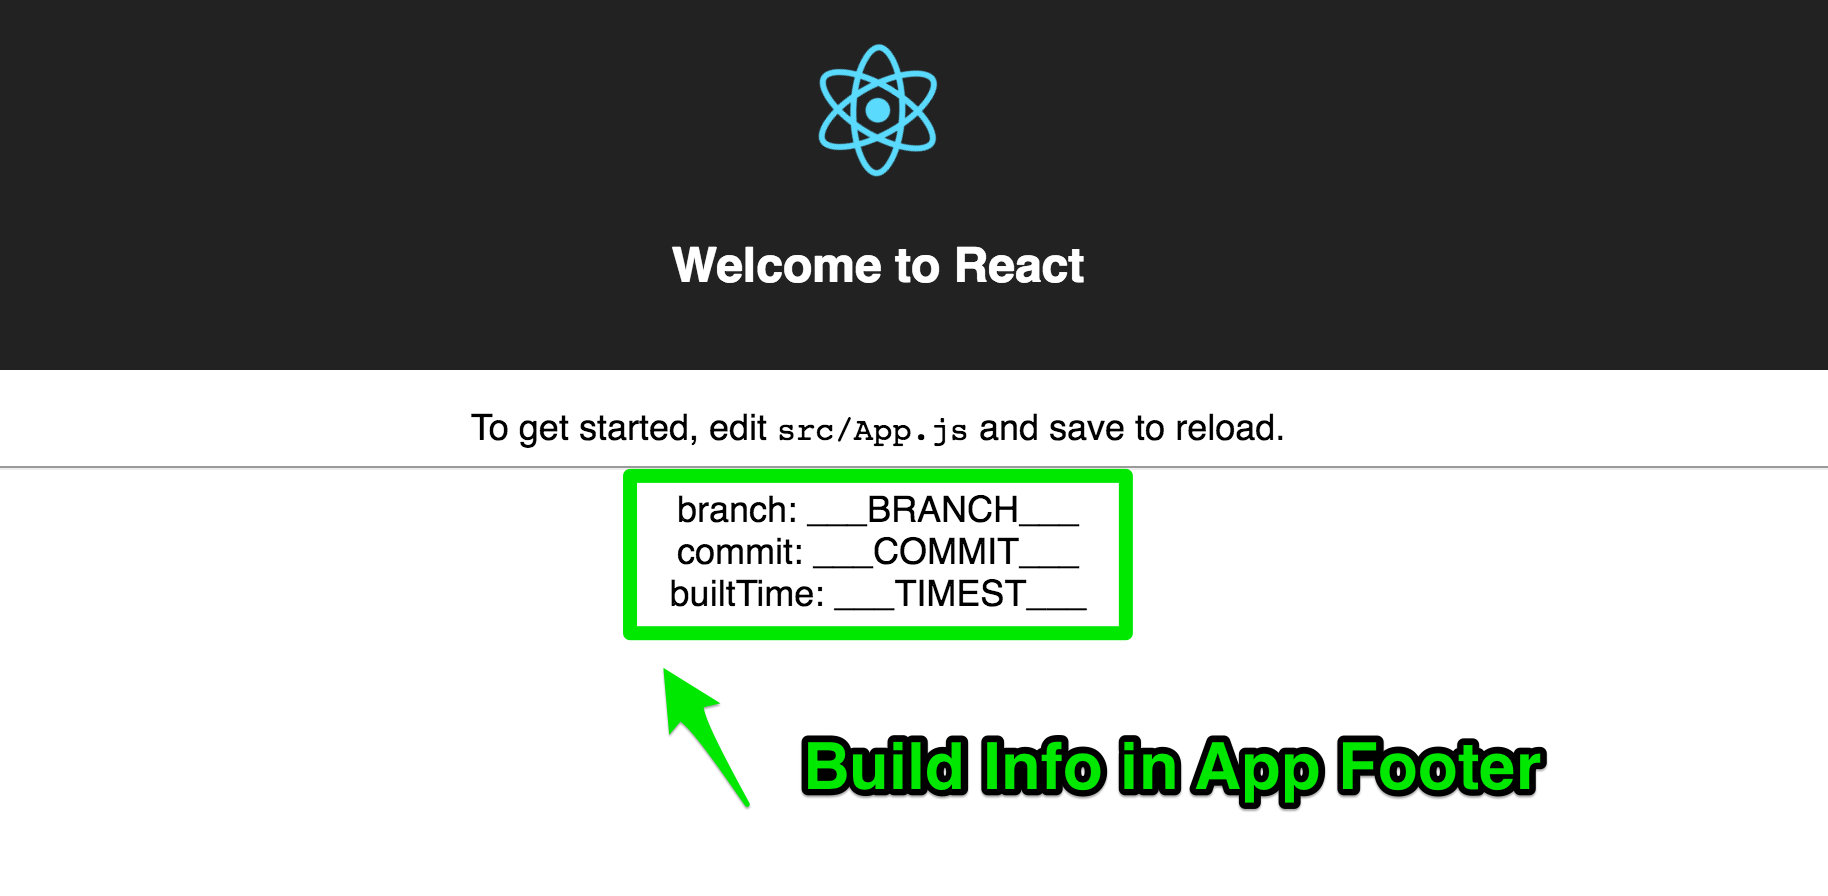
- Create some build-info file containing Git-Branchname, Git-Commit-Hash and Build-Timestamp displayed in React Application footer.
That sounds quite complex and usually I have some ugly bash scripts and use Jenkins to get the job done (which is also nice but does not follow the simplicity-paradigm).
Part I - Build Zero Config React Application
While looking for a simple buildchain for React I stumbled upon a recent React BlogPost about Create Apps with No Configuration. This looked really nice and provided ES6 and webpack out of the box therefore we will use that build-chain for our example.
Install the helper script with
shell:npm install -g create-react-app
And create the test-pipelines React Application with
shell:create-react-app test-pipelines
Now put that created project inside a Bitbucket Git Repository.
You should be able to run your application now with:
shell:npm install
shell:npm start
1. Create Deploy-Info File Logic
Since we want to display the Git-Branchname, Git-Commit-Hash and Build-Timestamp in the React Application footer we will create some files.
Create a file called src/deploy-info.js and put the following content inside:
github:61799ed3dee21c4705b2689a958614f4
Now change the src/App.js to look like this:
github:3133e51380b79bbbc88e5f1ca69571c1
Start up the application with
shell:npm start
And you should see the messages in the footer.
2. Configure Subdirectory Deployment Logic
At the time of writing PullRequest 162 was already merged but the new version was not deployed yet, so we need to change the react-scripts dependency in package.json to:
github:c50290aa74da949e5ba754ed9e4d5a7c
Also include this in your package.json file to point to your GitHub Pages URL:
github:53124d1a661308d5dfb65dc4224c5c6a
Note that we put in a placeholder called __SUBDIR__ which we will replace later during the build with an actual value.
You can clone the final example from GitHub.
3. Setup Bitbucket Pipelines
You have configured your React Application and pushed it to your remote Git Repository on Bitbuckt as described in the previous chapter. If you haven’t done so you can start by cloning a preconfigured Repository.
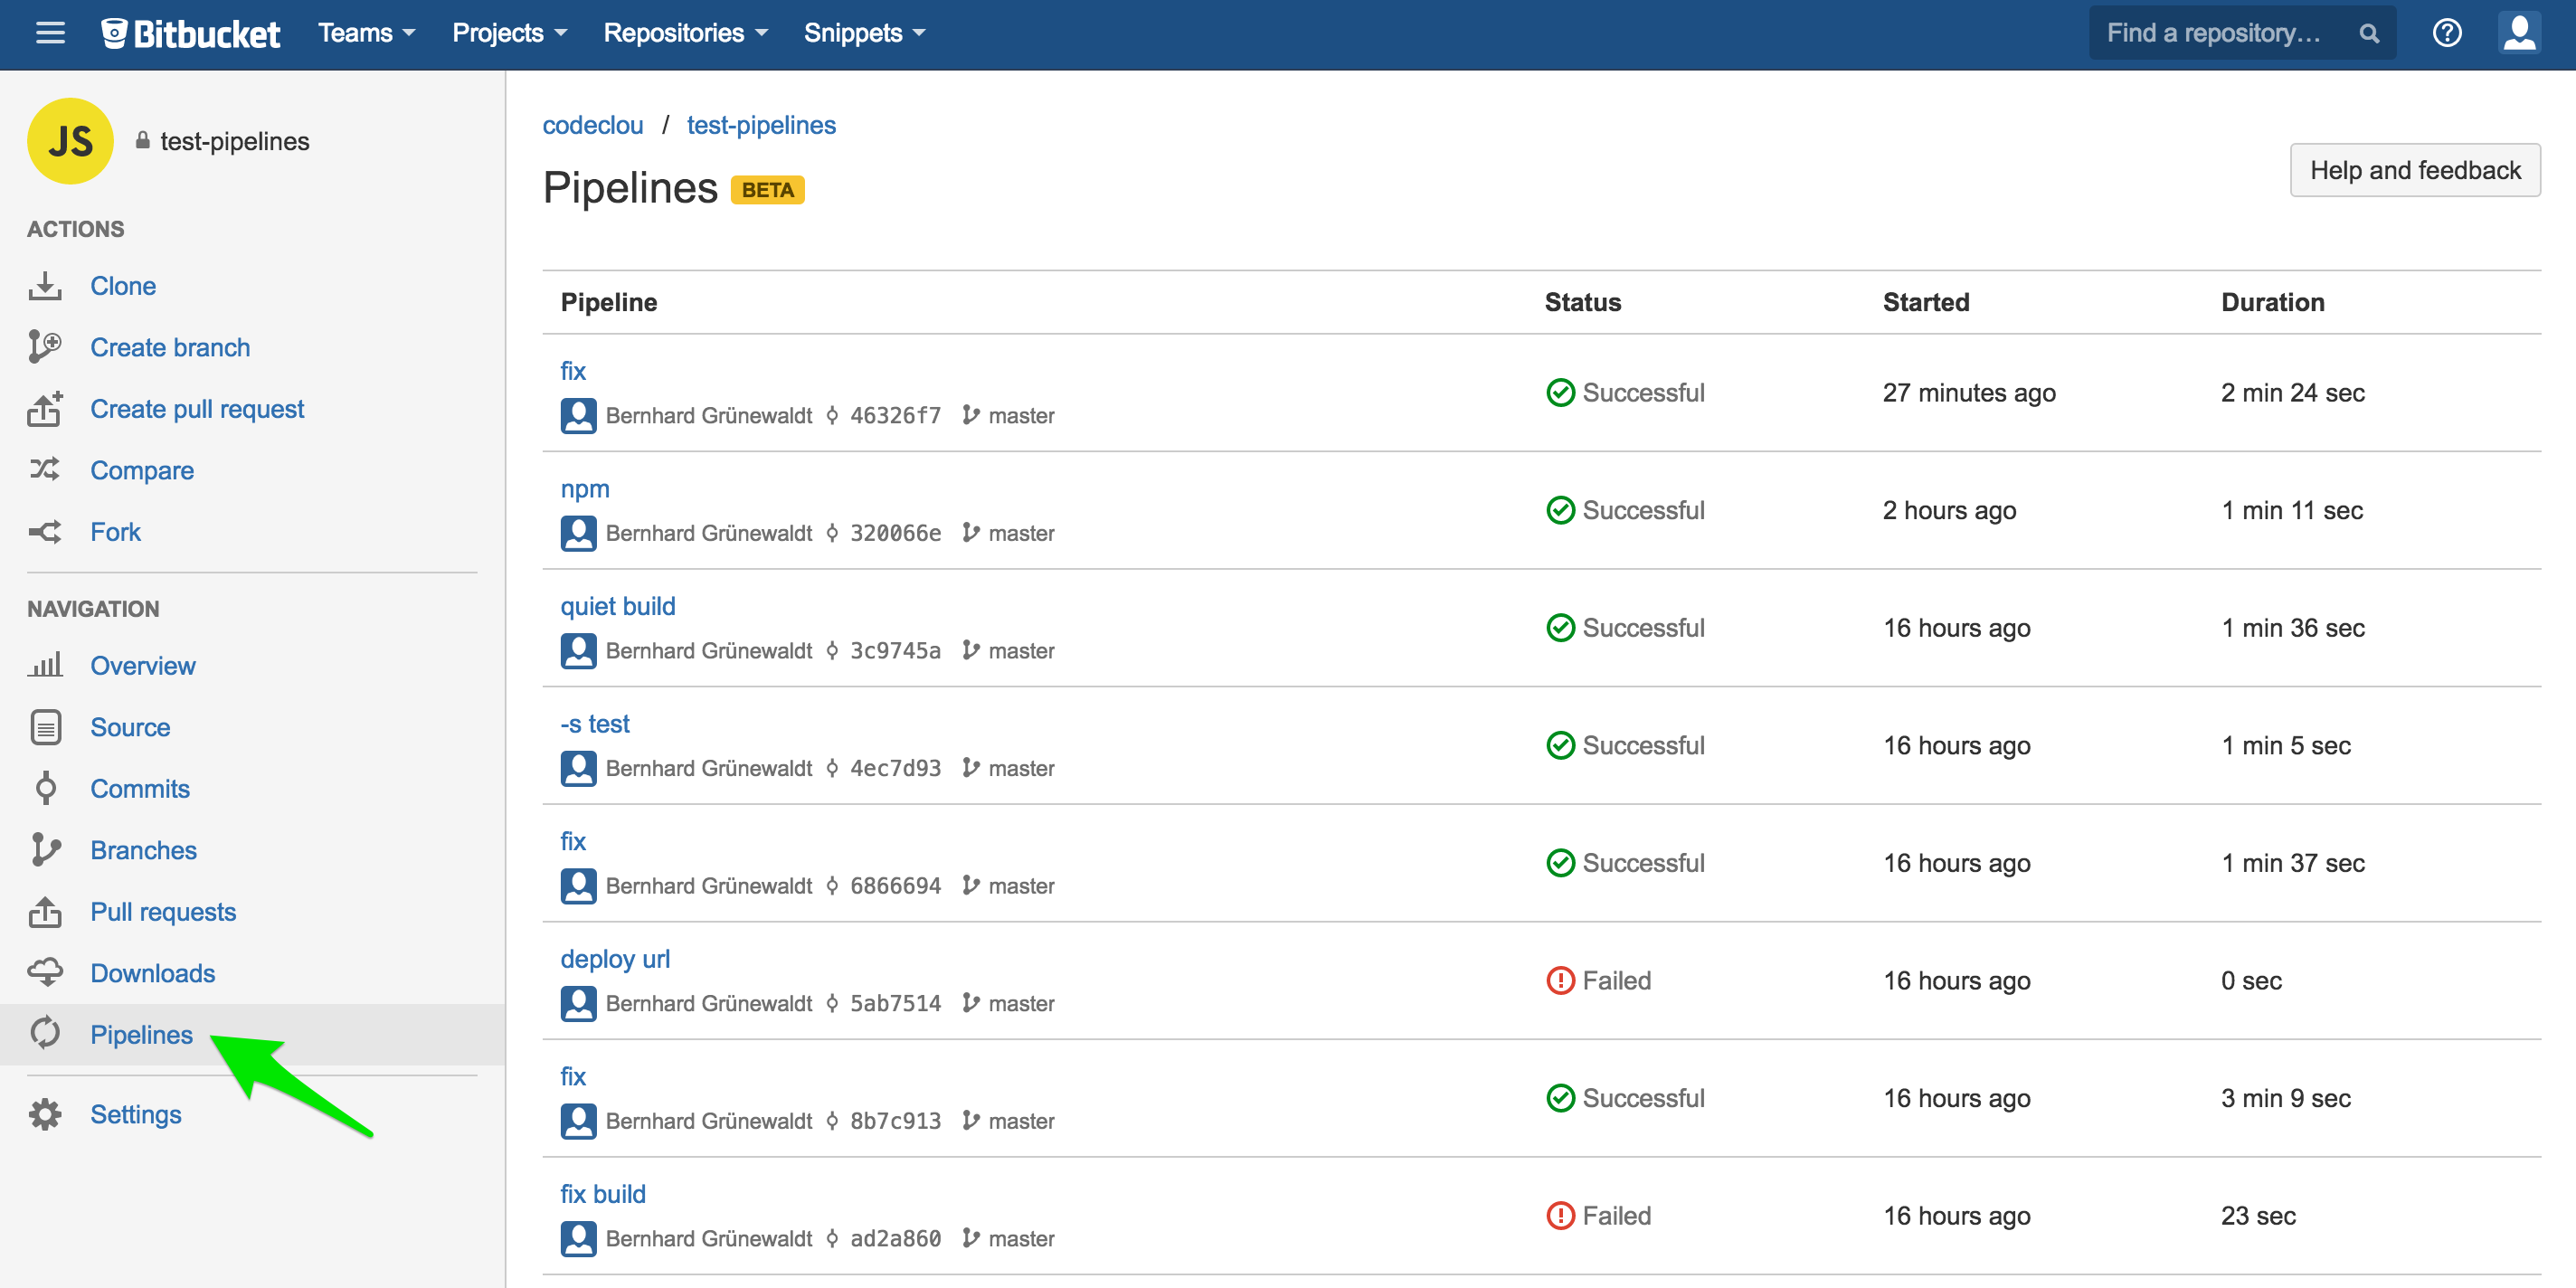
Once you joined the Bitbucket Pipelines Beta you will have a new menue item in the sidebar called Pipelines.
Before you will see that you will need to create a bitbucket-pipelines.yml file in the root of your previous created Bitbucket Git pipelines-test repository.
github:492a84a4d9832e0f7fb5c010c6b24345
Basically you first define a Docker image which is in our case node:5.11.0 and then you define build steps and scripts.
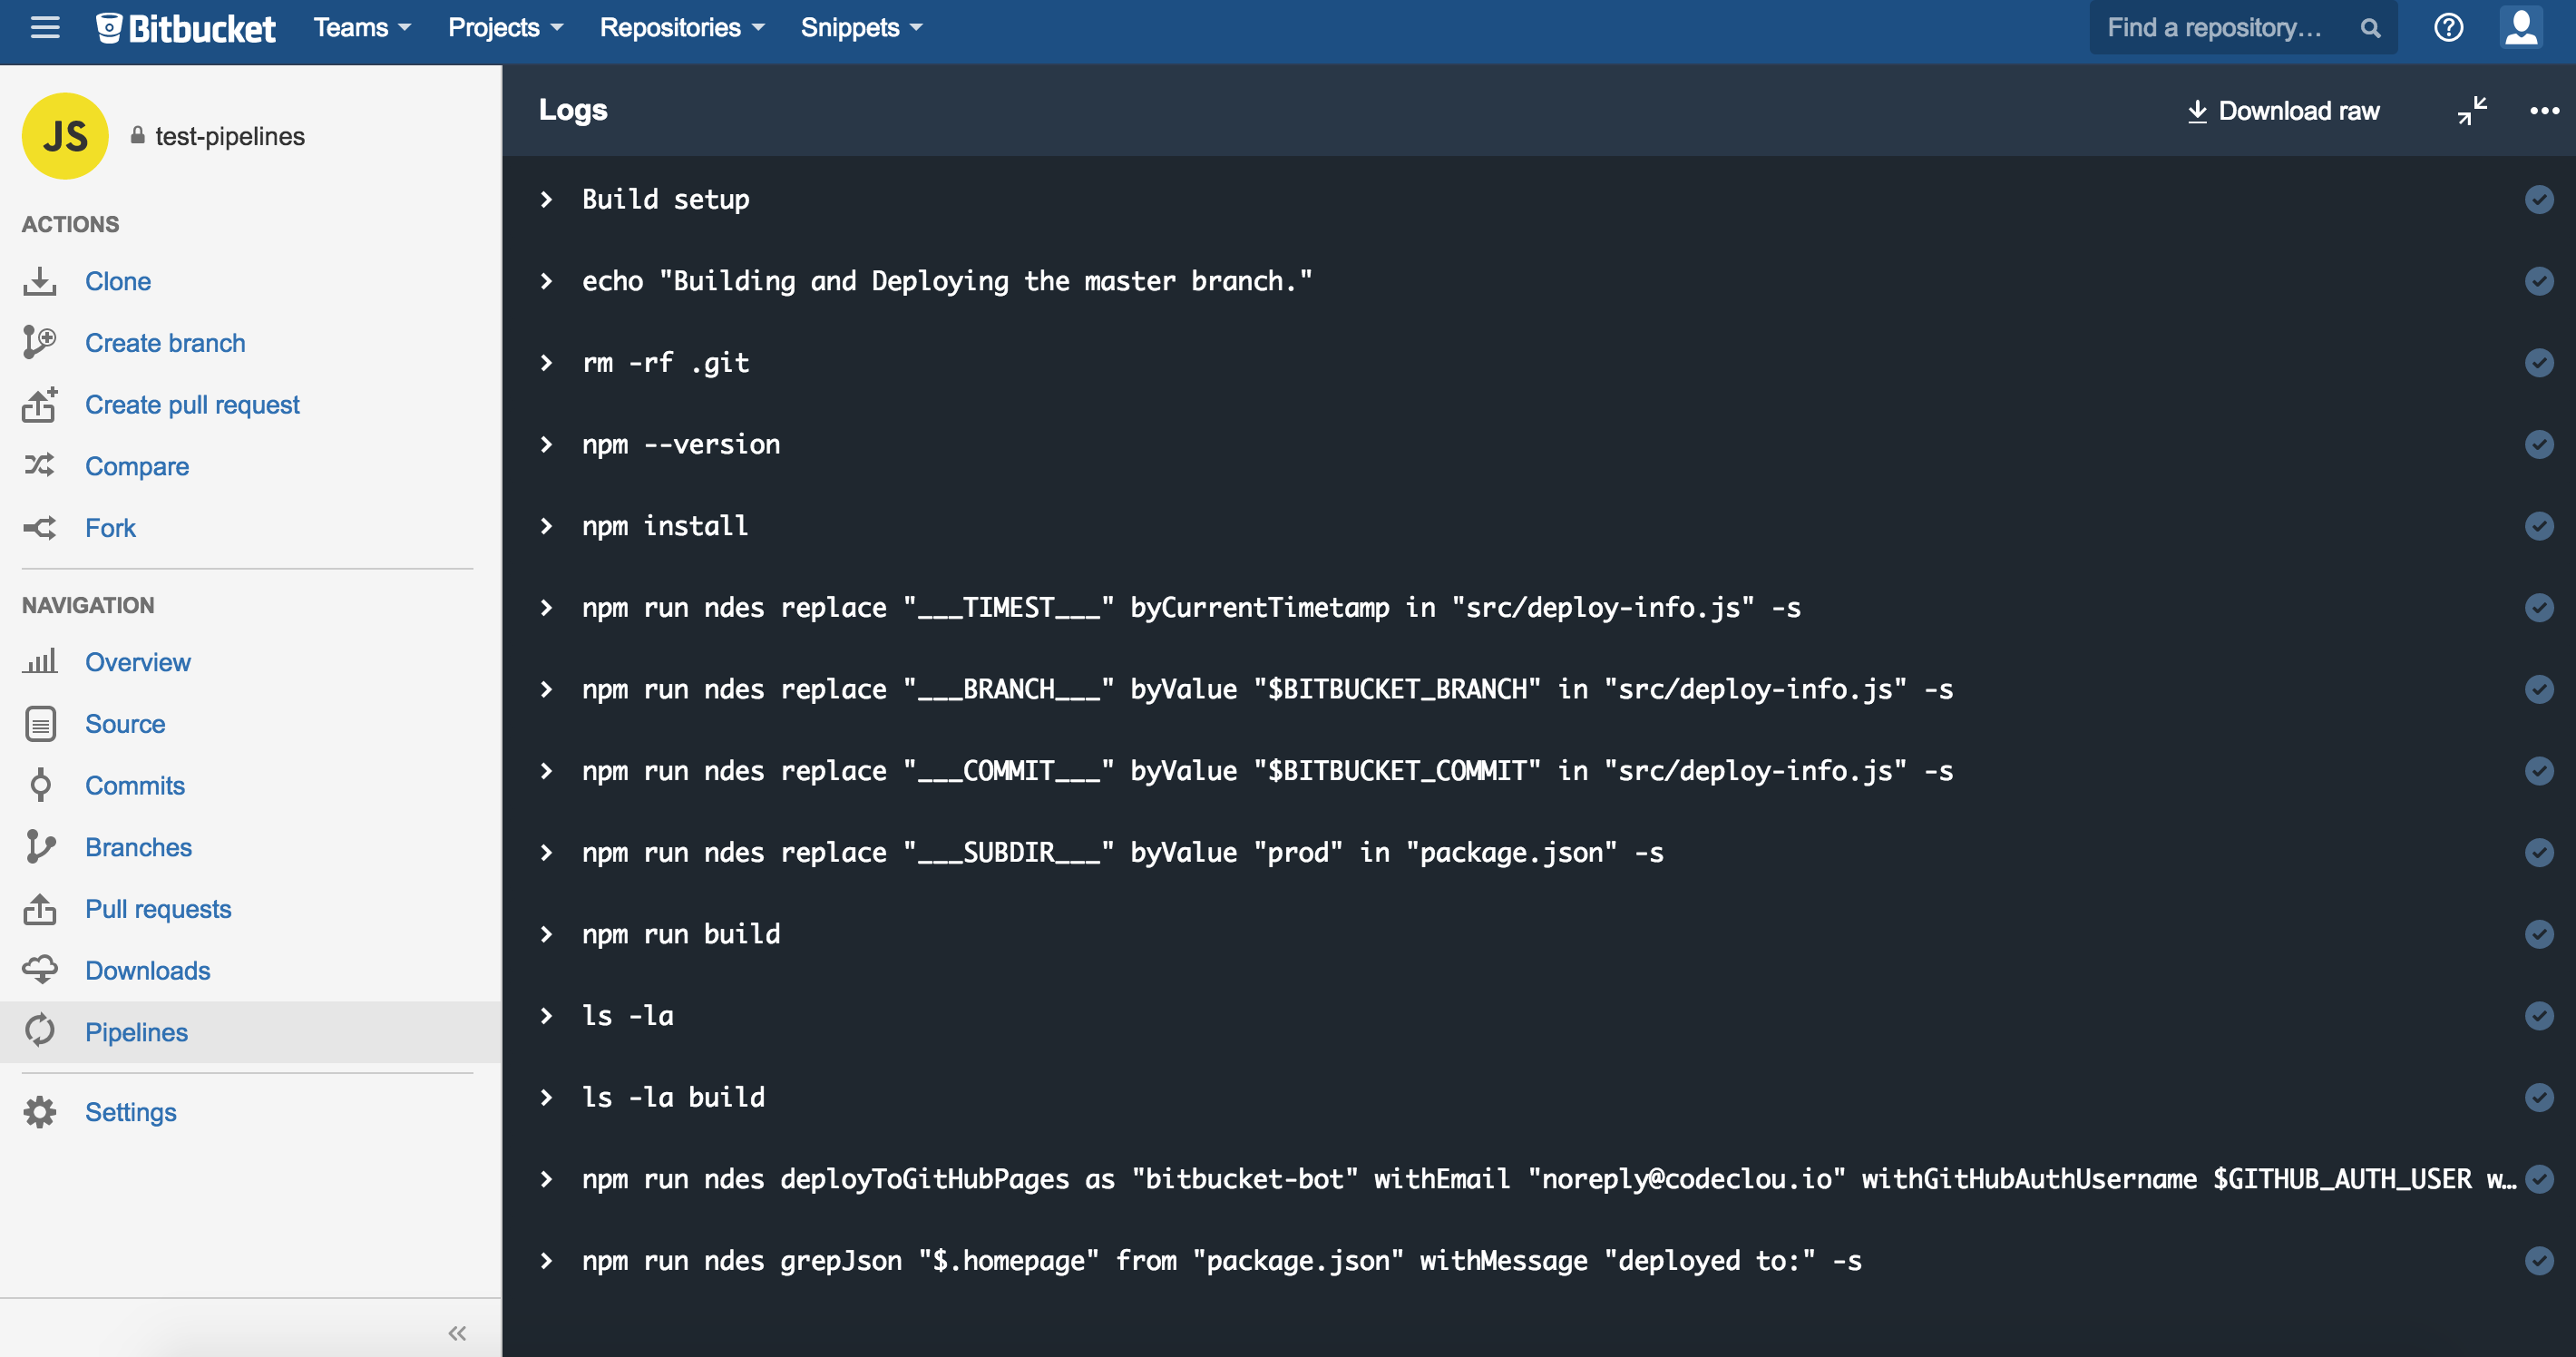
Once you push to your repository now the pipeline kicks in and will create a docker container, clone your repo and perform the build steps you defined.
Part 2 - Deploy Zero Config React Application
Ok now we have just built our Application but we want to deploy it and replace the placeholders we created in thepackage.json and src/deploy-info.js files.
As you might have seen the bitbucket-pipelines.yml file looks now really clean and we do not want to bloat it with shell commands or call external ugly shell commands… That’s why I created the node-deploy-essentials project so that we can write human readable and nicely looking deploy commands.
1. Install and Configure node-deploy-essentials
shell:npm install node-deploy-essentials --save-dev
Now change your package.json to contain the following scripts entry:
github:e748333207c290fd0a3037e187a7b1de
Alright, now we can use some neat commands and improve our bitbucket-pipelines.yml to deploy our built React Application.
2. Configure Bitbucket Pipeline Environment Variables
Since we want to clone a GitHub Repository we need to define username, password and the cloneUrl somewhere. And we don’t want to put that in our Code. Therefore create the following Pipeline Environment Variables on theRepository Settings - Envrionment variables Page.
- GITHUB_CLONE_URL = https://github.com/someone/bitbucket-pipeline-app-demo.git
- GITHUB_AUTH_USER = myuser
- GITHUB_AUTH_TOKEN = aa12131ffff (Your GitHub Personal Access token. Mark it as secured.)
Your Envrionments Page should look like this now:

3. Configure Deployment to GitHub Pages
Change your bitbucket-pipelines.yml file to this
github:8275771f140744a72945a86c45b41298
Ok know you might just have fallen off your chair but let me explain it step by step.
First of all we have configured two different build steps based on branchnames as described in the Bitbucket Pipelines doc. Branches called feature-… for example feature-buttonRed are built and deployed differently than themaster branch.
Commands explained step by step
shell:rm -rf .git
- since we will be cloning our GitHub Pages Git repository later we need first remove the .git folder of the currently cloned Git repository. (You cannot clone a second repository into an existing one without conflicts)
shell:npm --version
- just prints out the version on npm.
shell:npm install
- installs the dependencies of our test-pipelines React Application.
shell:npm run ndes replace "___TIMEST___" byCurrentTimetamp in "src/deploy-info.js" -s
- Using the node-deploy-essentials replace command we basically replace by an ISO 8601 DateString like 2016-07-25T20:50:23.722Z. (see the docs for more details)
shell:npm run ndes replace "___BRANCH___" byValue "$BITBUCKET_BRANCH" in "src/deploy-info.js" -s
- like before the node-deploy-essentials replace command replaces by $BITBUCKET_BRANCH which contains the current branchname of test-pipelines provided by Bitbucket Pipelines as Environment Variable.
shell:npm run ndes replace "___COMMIT___" byValue "$BITBUCKET_COMMIT" in "src/deploy-info.js" -s
- is replaced by the actual commit hash provided as ENV-Variable .
After all that replacing the src/deploy-info.js file looks like this (example)
github:2bb60e3f4cc6d3be9b0164b476561ad9
Ok let’s continue with replacing in package.json
shell:npm run ndes replace "___SUBDIR___" byValue "branch-$BITBUCKET_BRANCH" in "package.json" -s
- before replace:
- "homepage": "https://someone.github.io/bitbucket-pipeline-app-demo/___SUBDIR___/"
- after for Master Branch:
- "homepage": "https://someone.github.io/bitbucket-pipeline-app-demo/prod/"
- after for Feature Branch:
- "homepage": "https://someone.github.io/bitbucket-pipeline-app-demo/branch-feature-redButton/"
The actual build command
shell:npm run build
- As you build locally this builds the React Application and creates the ./build/ folder containing index.html and bundled js and css files as well as all other assets.
shell:ls -la
- Since we cannot look into the docker container we use this command to list all files in the root directory of the project.
shell:ls -la build
- This lists all files inside the ./build/ directory. If you want to actually see a files content just use cat build/index.html as script.
Now let’s deploy to GitHub Pages
shell:npm run ndes deployToGitHubPages as "bitbucket-bot" withEmail "noreply@something.io" withGitHubAuthUsername $GITHUB_AUTH_USER withGitHubAuthToken $GITHUB_AUTH_TOKEN toRepository $GITHUB_CLONE_URL fromSource build intoSubdirectory prod -s
- First of all - yes it is a very long line but Bitbucket Pipelines is limited to single line commands for now and once you read it step by step it isn’t that long. Basically it defines all parameters necessary to clone the Repository containing the gh-pages branch. It will clone it, move our files inside, add, commit and push. Adjust the parameters to your needs.
- You can read all details on the parameters in the node-deploy-essentials doc
- We have already set $GITHUB_AUTH_USER, $GITHUB_AUTH_TOKEN and $GITHUB_CLONE_URL as Bitbucket Pipeline Environment Variables in the previous chapter.
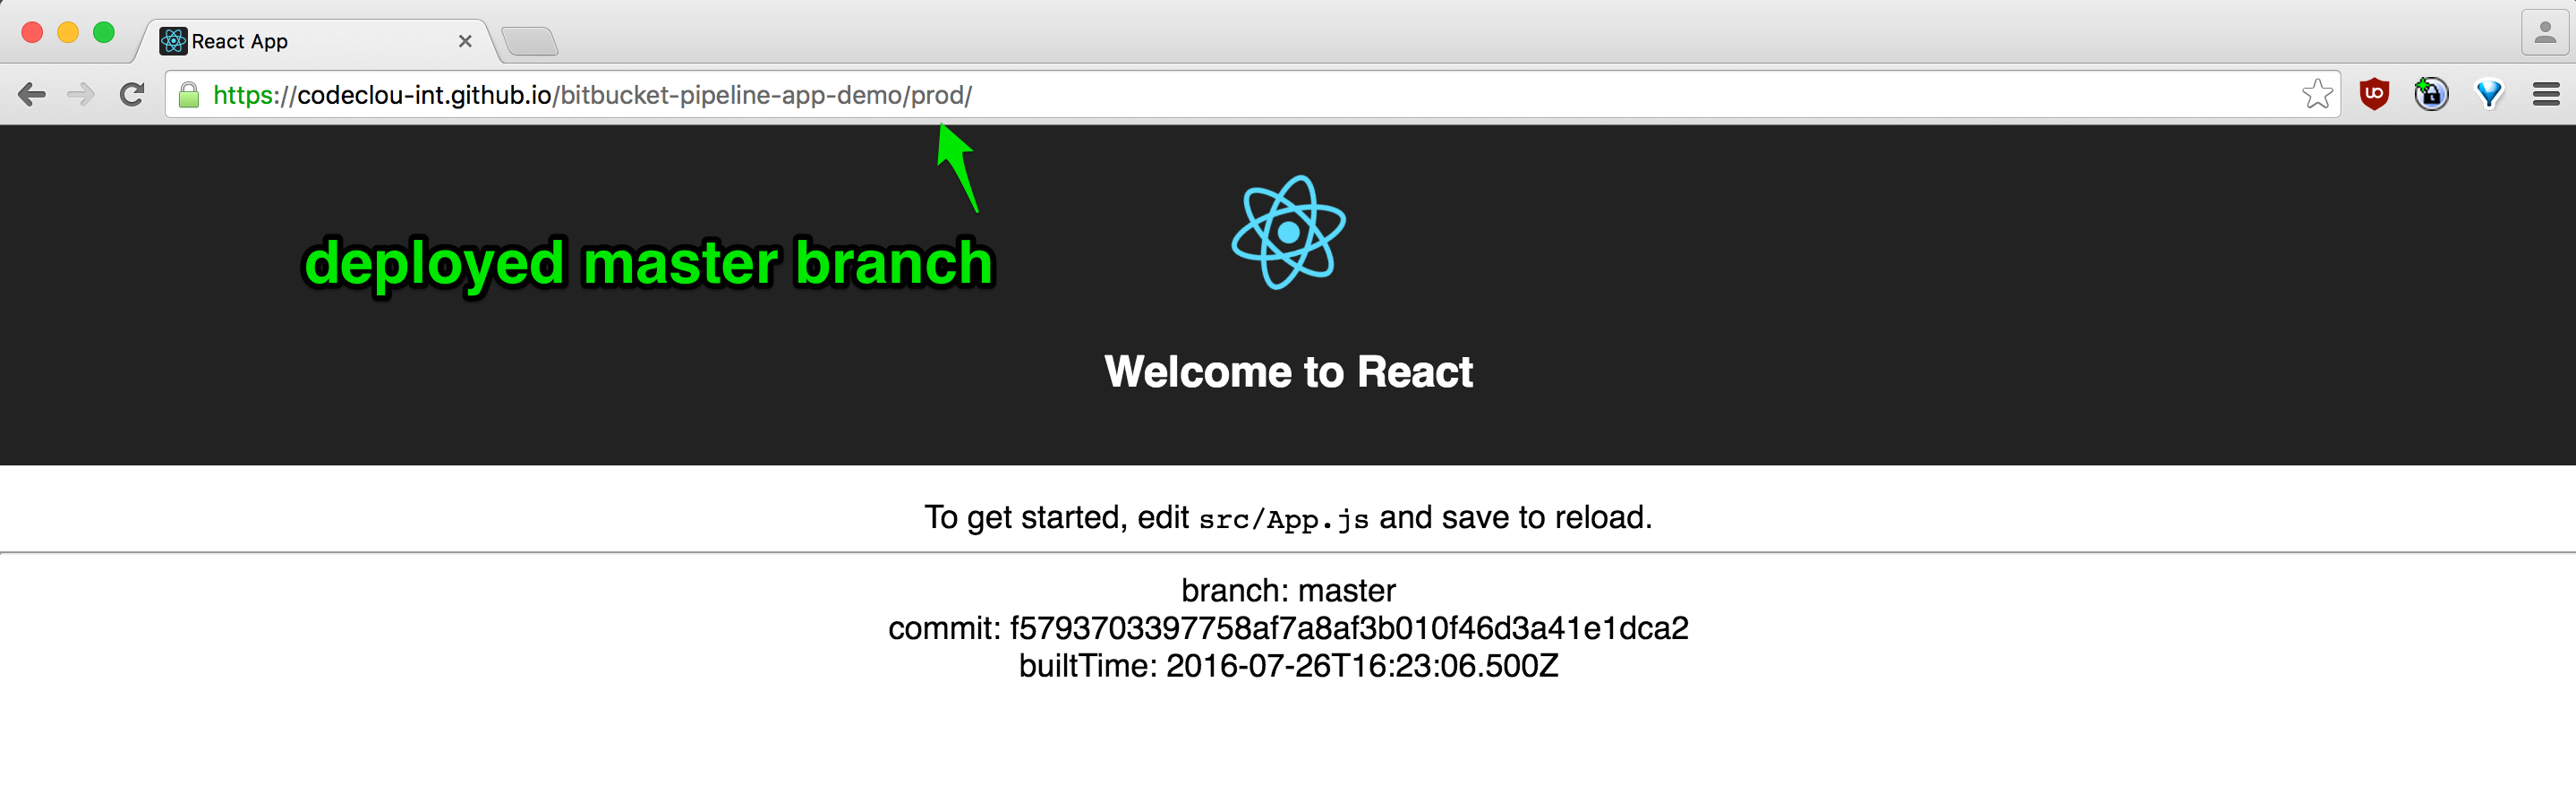
- The master branch is deployed to the prod subdirectory.
- The feature-… branches are deployed to the branch-feature-… subdirectory.
shell:npm run ndes grepJson "$.homepage" from "package.json" withMessage "deployed to:" -s
- This command just greps the homepage value from package.json and echos it. You could use that command in conjunction with a CURL command to send the deployed URL to a Slack or HipChat ChatRoom.
- Output for Master Branch: deployed to: https://someone.github.io/bitbucket-pipeline-app-demo/prod/
Now you are all set and can push changes to your Repository. This is how a sucessfull master branch build looks like
The deployed React App looks like this
Conclusion
Zero Config … Ok you got me there it is still some config. But you have to say it is less than setting all this up some other way. And a normal human beeing can now understand the build process. So we can agree on almost zero config :)
What I like the most about Bitbucket Pipelines is that it’s closely integrated and I don’t have to manually configure jobs and it is automatically in sync with the commits. The ability to handle feature branches differently is a huge plus too. And since it is based on docker you can configure yourself some crazy docker image with all your mocked database stuff or any other tools or scripts and just call them from your bitbucket-pipelines.yml.
Can’t wait for it to come out of Beta :)
If you need help with JIRA, Confluence or any other Atlassian product we offer Atlassian Experts Services. We are experienced in the Setup of Atlassian Products in your own datacenter and on AWS. We also offer consulting via webmeeting worldwide. Feel free to contact us via the contact form below.